
Newspaper Pots
You will need:
- Newspaper
- Tin can
- Compost
- Seeds
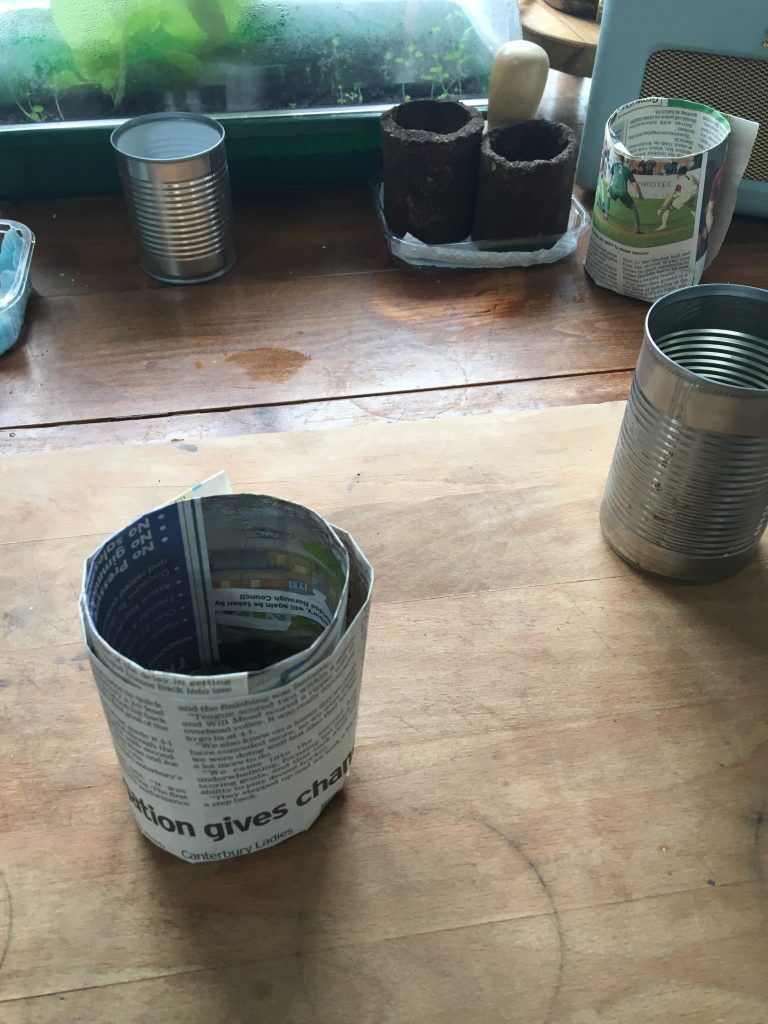
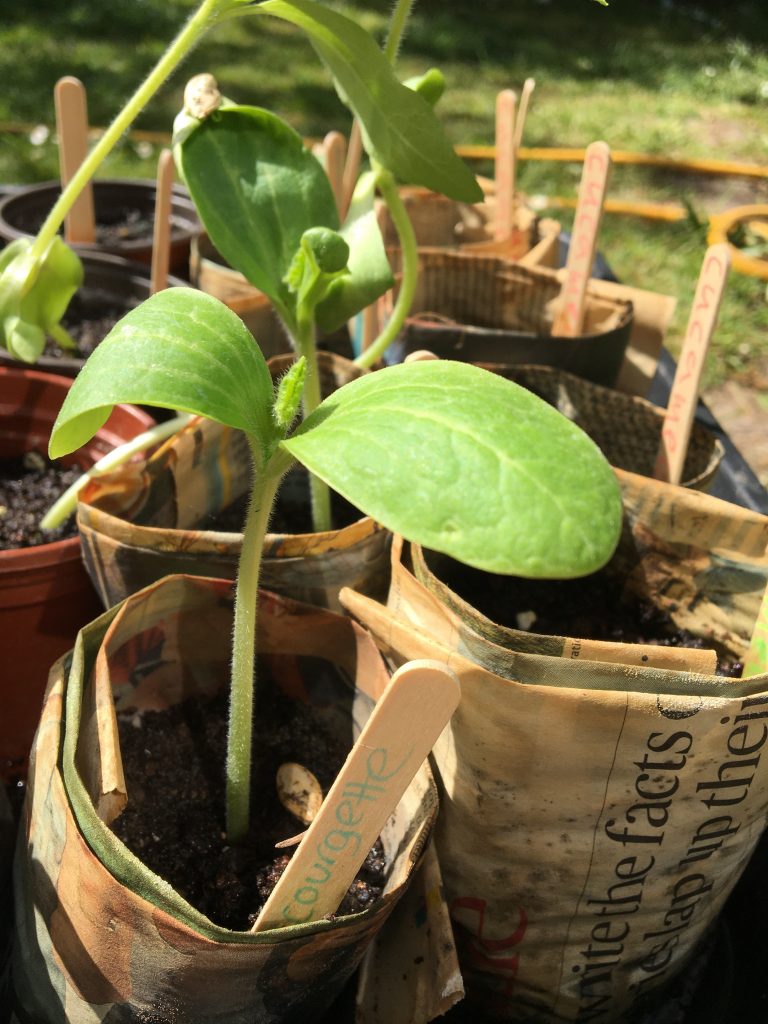
Making paper pots out of newspapers is fun and a great way to recycle. Once the pots are made, you can plant them up and wait for your produce to grow, place the pots directly into the ground without having to disturb your plants. Easy, so lets give it a try.
- Find an old newspaper and take one sheet out
- Fold length ways so you have a long strip of newspaper
- Take a recycled tin can (with lid removed) and place the solid end along the folded edge of the newspaper
- Wrap the paper loosely around the tin and roll around until you have a tube around the tin
- Fold one edge of the paper into the hole of the tin
- Remove the tin from its sleeve
- Put the tin, flat end first, back into the paper pot and squish the paper flat inside the pot
- Ta da! Your pot is ready to fill with compost
- Water your pot, then plant up with seed (sunflowers or beans are good) and cover with a thin layer of compost
- Water again and place in a warm sunny spot, keep moist
- When your plants have grown and are ready to plant outside, place the entire pot into the soil, the paper will break down and your plants will grow happily out of the pot
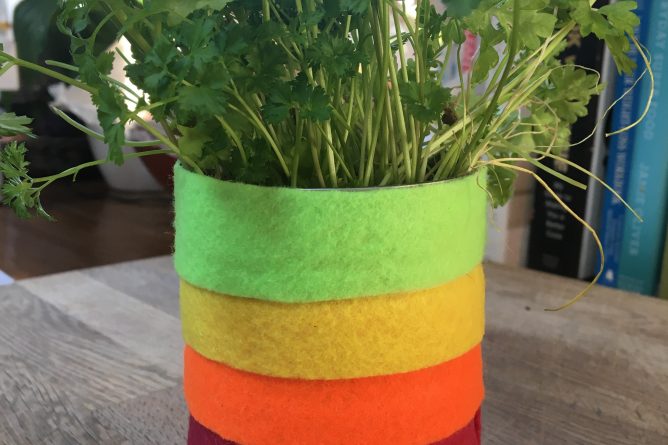
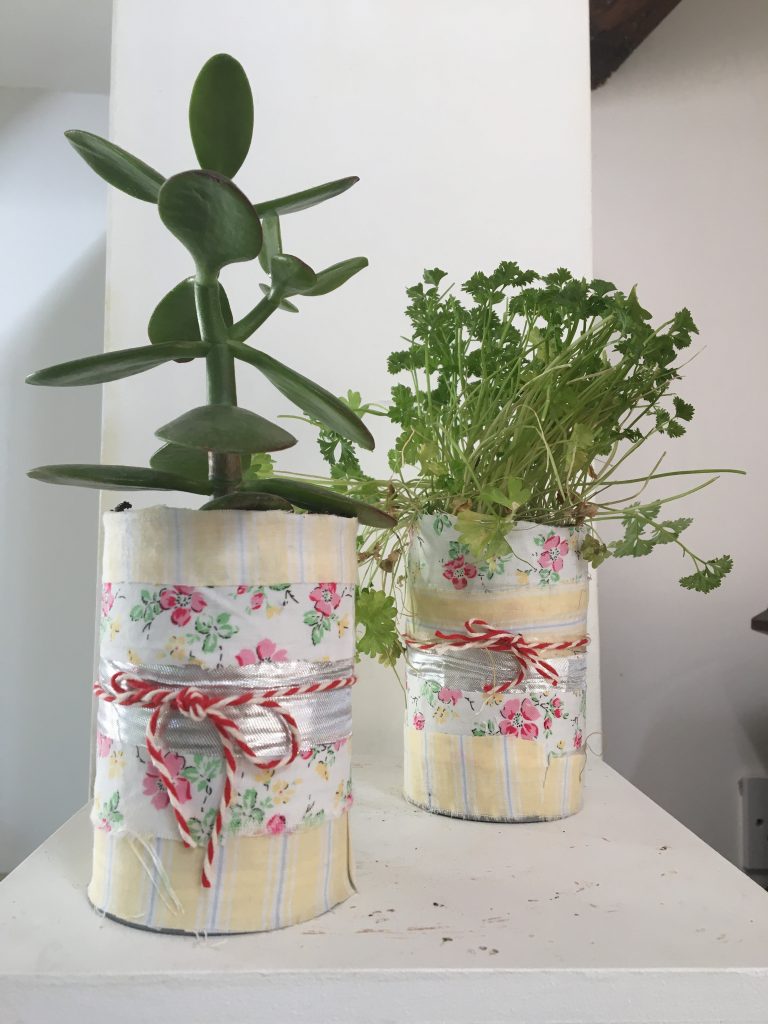
Fabric Tin Can Planters
You will need:
- Tin cans
- Hammer & Nail
- Doubled sided sticky tape
- Recycled fabric (in strips)
- Scissors
- Compost & Seeds (seasonal herbs or bulbs)
Brighten up any windowsill with these easy to make recycled fabric tin planters. Perfect for growing herbs or spring bulbs in on a budget and great for the environment too.
- Wash out your used tin cans, remove any paper labels and bang two or three drainage holes in the bottom using a hammer and nail (on a work surface like a chopping board).
- Cut some old fabric into strips about 2cm thick and long enough to wrap around your tin. They don’t have to be neat.
- Stick a strip of double sided sticky tape around the tin at the bottom of your tin can, cut to make a sticky ring all around.
- Add one strip of fabric on top of the tape, cut off any excess fabric so each end meets.
- Add another layer of sticky tape above your fabric and overlay another strip of fabric in another colour for contrast, trim and make sure you don’t leave a gap between the first and second fabric strip, each strip should overlap the one before.
- Repeat the process all the way up the tin until you reach the top, trim any excess fabric around the top edge, or fold the fabric over the top if the edge is sharp, being careful to stick it down with a layer of tape first.
- Add decorations to finish your multi fabric masterpiece! Wrap string around it and tie in a bow, add ribbon or glue on buttons, let your creativity shine.
- Now your planter is ready to plant; add seed compost to the tin, water, then sprinkle your herb seeds, or plant a Spring bulb following the packet guidelines. Cover with another layer of compost, water again and keep in a warm sunny spot watering regularly. Then see your creation come to life!
Recycled Milk Bottle 5x Ways
You will need:
- Plastic Milk Bottles (x5)
- Craft Knife
- Hammer & Nail (or sharp pointed object like a scewer)
- Compost
- Seeds – bird seeds and herb seeds to plant
- Marker pen
- Kebab sticks
- String
Making a new use for any object is fun, but making five uses out of your used plastic milk bottles is incredible!
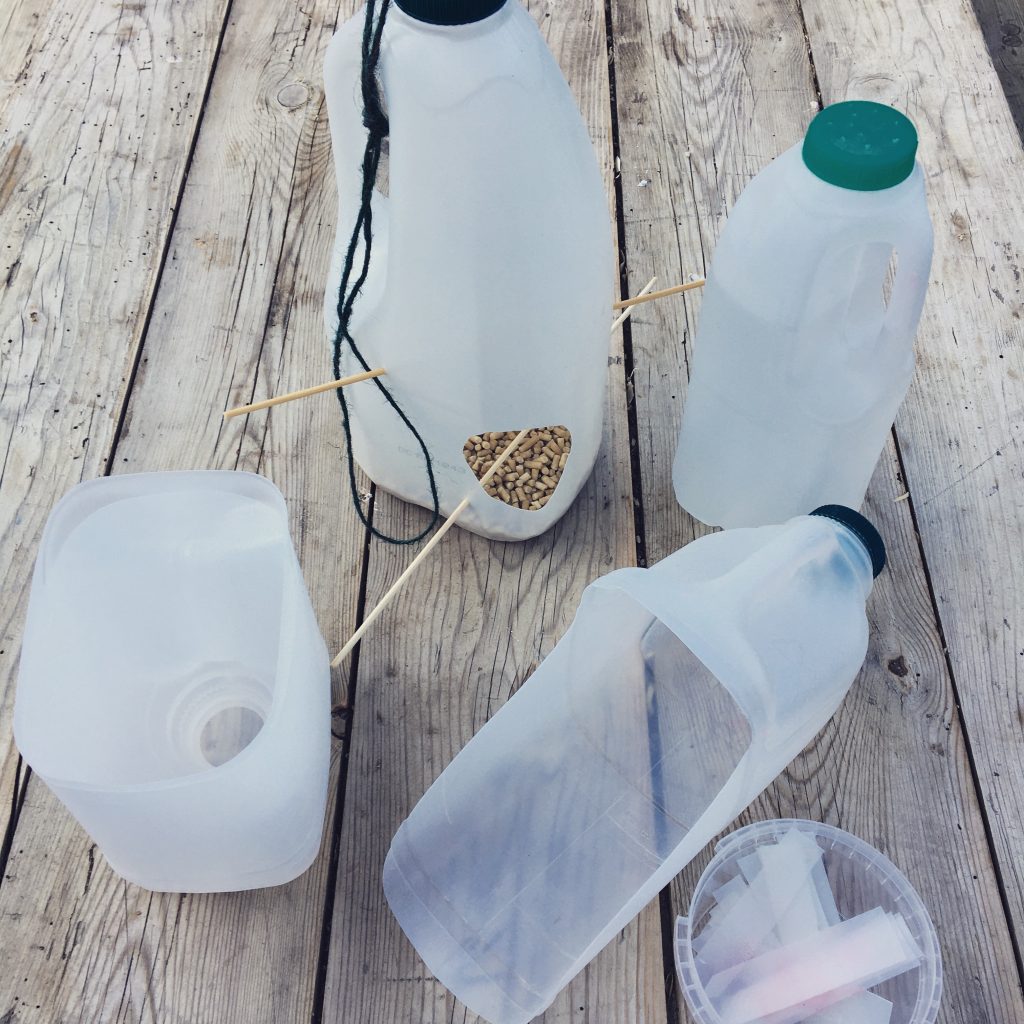
- Bird feeder
- Draw a large circle on the bottle to make a hole to let birds inside to feed on the seed (at least 2 cm from the bottom)
- Carefully cut the hole out using a craft knife
- Screw a smaller hole underneath the big hole
- Insert a kebab stick into the small hole to act as a perch for the birds to land on
- Screw a hole through the lid of the bottle, feed an arms length of string through the hole, and tie several knots in the end that screws inside the bottle
- Loop the other end of string and tie so you have a loop you can hang on a tree branch or hook outside
- Screw the lid on the bottle
- Fill the base with birdseed, its ready to go!
- Sprinkling watering bottle
- Remove the lid from your bottle and place over something soft like a cushion, screw side up (to ensure a good flow)
- With a screw or hammer and nail, make several small holes in the lid for the water to sprinkle out
- Fill the bottle with water
- Screw the lid back on and you have a practical sprinkling watering bottle to place near your plants, this is especially good for seedlings and your plants that need delicate watering
- Scoop
- Place your water bottle on its side with the handle facing up
- Draw a scoop shape around the bottle starting from the top edge of the bottle, half way along, down in a rainbow shaped arch to the bottom edge of the bottle at the base
- Cut along the top edge to meet each scoop shaped arch
- Job done, you have a scoop perfect for filling your pots from the compost bag
- Plant labels
- With any spare plastic you have, utilise for plant labels by cutting into strips about 1cm wide by 8cm long (finger size)
- Trim one edge to a point and set aside for your planting projects
- Use a marker pen to label your pots so the plant names do not wash off when watering
- You have a invaluable stash of plant labels at your fingertips!
- Self-draining planter
- Cut a milk bottle around its centre in half carefully using a craft knife
- Remove the lid from the bottle and turn the milk bottle top half upside down
- Place the top half of the bottle back into the bottom half of the bottle, so the bottle ‘mouth’ is face down at the bottle base
- You are ready to fill the container with compost and plant some seeds! When you water, the water will collect in the base and your plant will be happy and stay moist
Good luck with making these, and send some lovely photos to kentcog@kent.ac.uk
All the best,
Emily Hill Kent Community Oasis Garden Coordinator