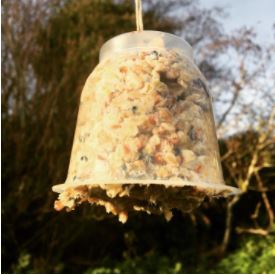
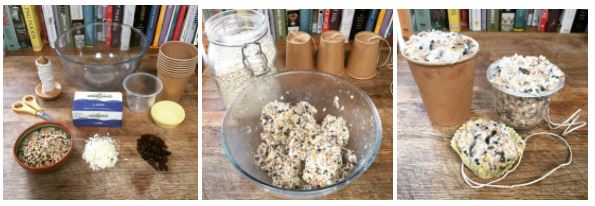
This easy recipe is taken from the RSPB website, and in its simplest form mixes wild birdseeds and nuts with lard to form a texture that you can shape into balls or ‘cakes’ to hang from tree branches. The birds will love these during the winter months and you can add little extra treats to really feed them up such as grated cheese and raisins. Be careful to select seeds suitable for birds, and peanuts for birds, not humans, as they are very different in their toxicity and salt content. Most local convenience stores will sell wild birdseed, and garden centres and pet supply shops will provide nuts for birds. Oats are great to add too to build consistency.
Step 1Take a paper cup or recycled yogurt pot and prepare it for hanging in a tree by piercing a hole in the bottom, feeding string through, and tying the string to form a knot. Leave enough string to hang from a branch. The pot will hang upside down, so your knot should be inside the pot/cup.
Step 2Let your lard soften at room temperature (no need to melt it) and cut it into small cubes. Add the cubes to the mixing bowl.
Step 3Add all the other ingredients to your mixing bowl, mix and squidge together with your fingertips until it holds together.
Step 4Fill your cup/pot with bird cake mixture, leave to set in the fridge for and hour or so. Once set, remove ready to hang.
Step 5Hang your pot from a tree and enjoy watching the birds feed!
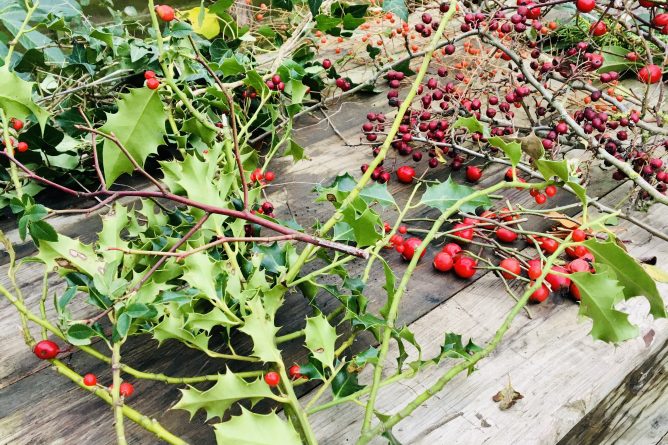
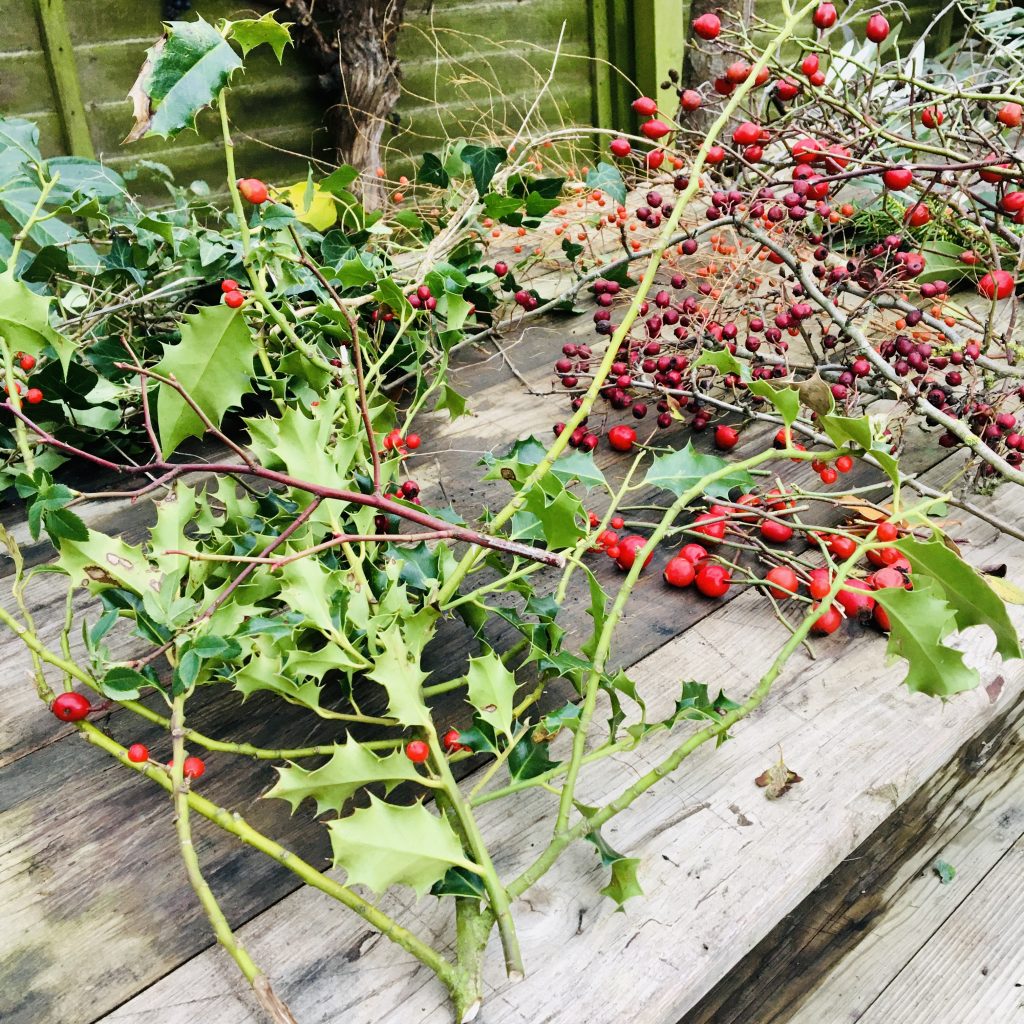
Foraged natural materials (e.g. willow, twisted willow, holly, ivy, hawthorn berries, rosehip berries, laurel, olive or fir branches)
Extra decorations (ribbons, festive spray, pine cones -optional)
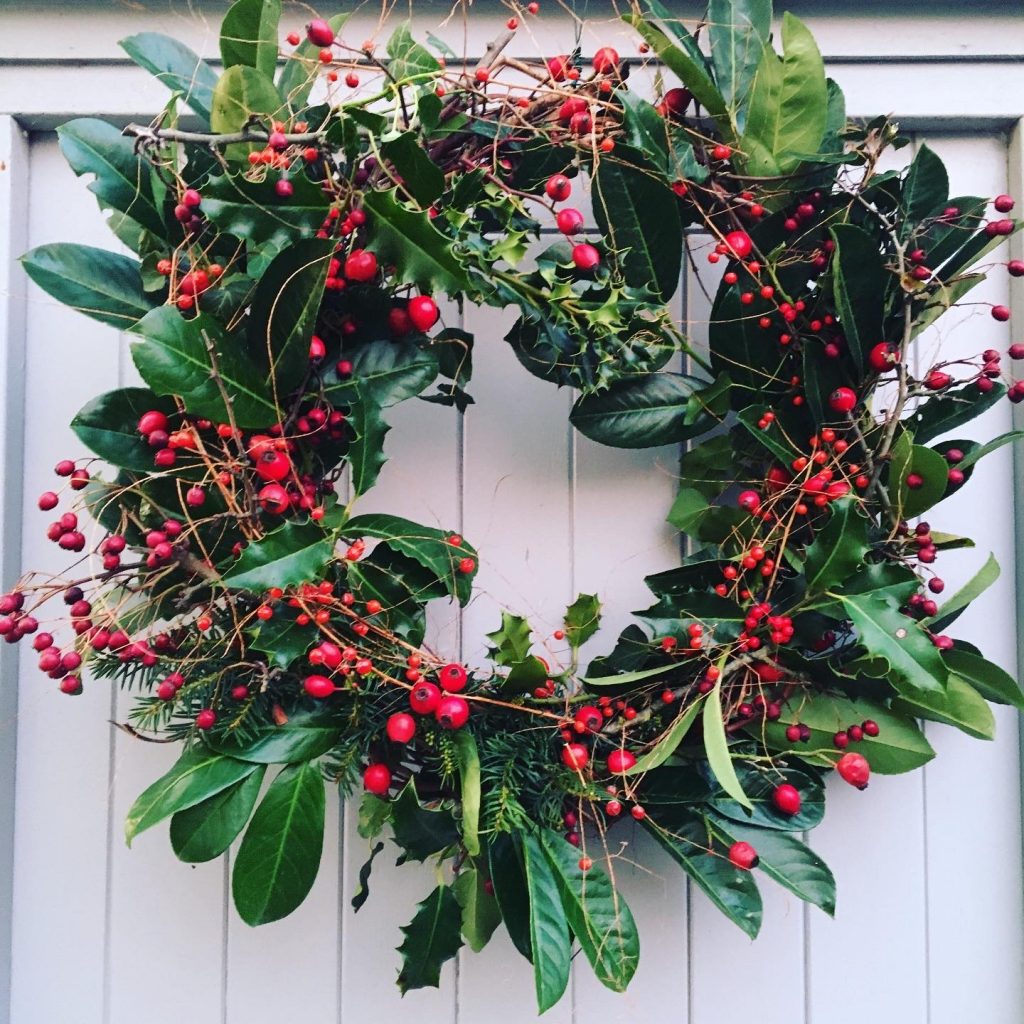
The only rule of thumb for wreath making is that there are no rules!
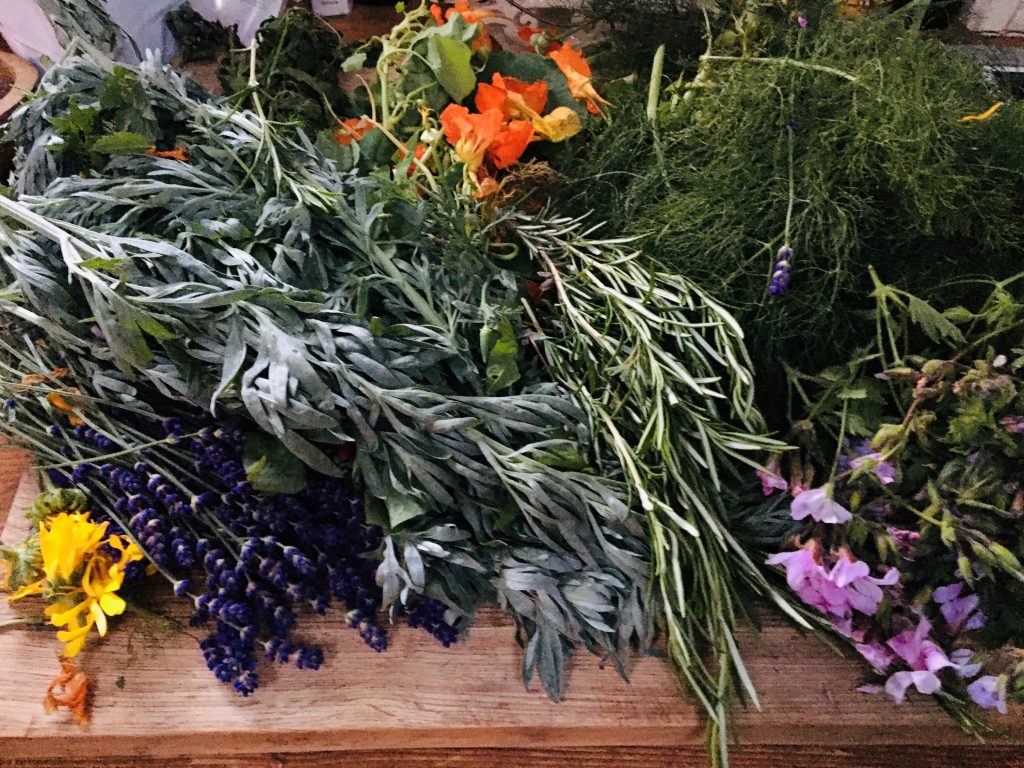
This activity is all about having fun preparing for the festive season. It’s about playfulness and creativity, so gather some friends, don your woolly hats a go for a good old-fashioned walk in the countryside. Best take a big shopping bag and pair of secateurs for carrying your haul home, and don’t forget those all-important gardening gloves as you’re sure to get prickled otherwise.
Have fun selecting the biggest brightest rosehip berries you can find, and fill up your bag with lots of arm length pieces of twisted willow or ivy as these will help form the base circle to attach everything to. Be careful to forage only where you sense it will not have a big impact on the environment, don’t strip a bush bare for example, take a few berries from a range of sources, and never forage on private property.
If you struggle to free style it and need some structure in your selection, check out Country Living’s 80 ideas for Christmas wreaths on google (or Ecosia, the search engine that plant trees!). It may help you form an idea of what to look out for, but what’s more fun than going on a treasure hunt and being inspired by what you find by chance? Once you have a cheerful variety of autumnal colours and textures in your bag return home and put the kettle on. Once you’ve warmed up, its time to play! Just a few top tips to get started:
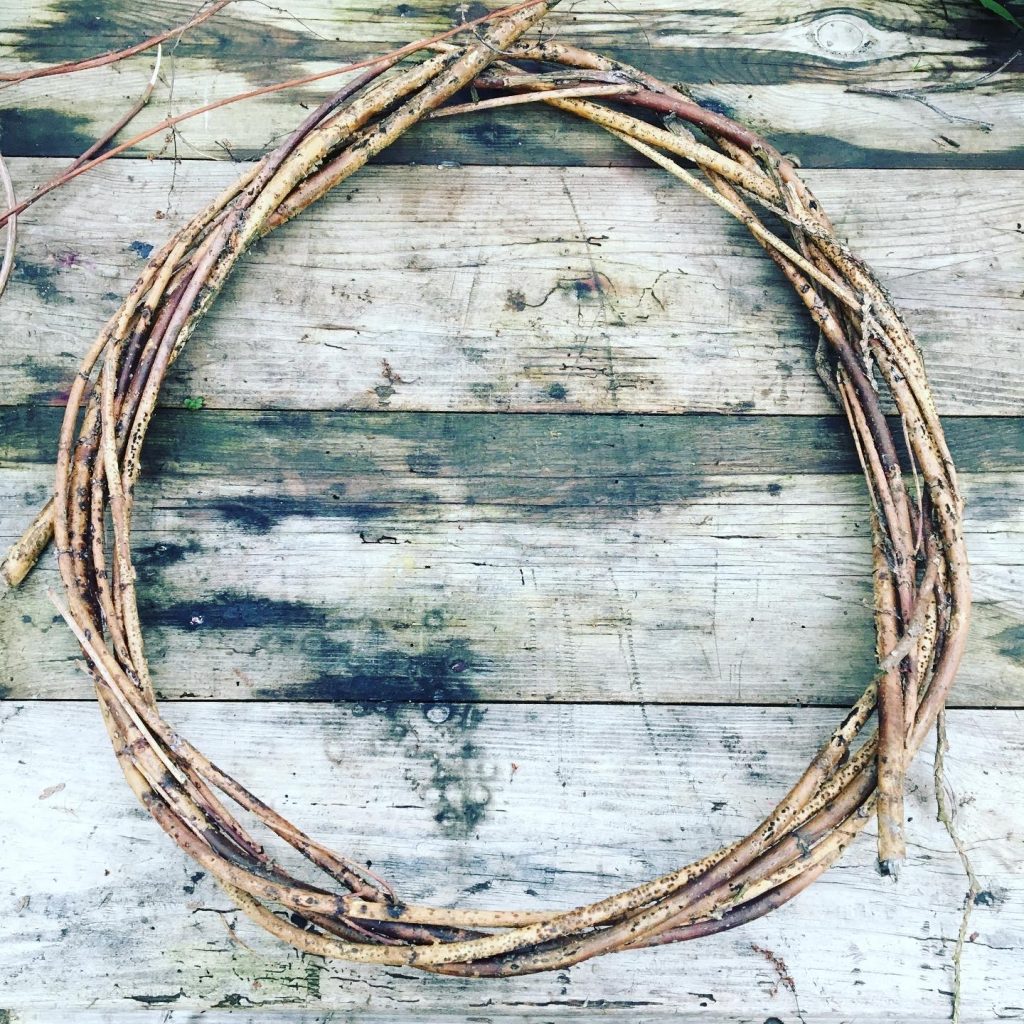
Begin by forming a pizza-sized circle with you strips of willow, ivy, or even grapevine if you can find any. You can loosen hazel rods or twines by first bending them over your thigh to start to stretch them, then twist a few around each other and build up your circle. Better still, use last years base circle if you saved it, and just add new twines.
Build up your base by attaching your big leaves, like laurel ivy or holly branches cut to the size of your forearm. Keep adding your green foliage until you are satisfied with the look and feel of your wreath.
Now’s a good time to secure your display so far by twisting gardening wire around your leaves. Go around and around and don’t forget to create a loop at the top of your wreath with the wire enabling you to hang it later.
Here’s when you can go wild adding all your colourful berries and unusual finds, you’ll soon disguise any wire, but its good to stand back, take a look, and pull any squashed leaves free.
Now its style this baby! Add a giant ribbon, or some glittery pinecones if you wish, make it your own, hang it on your door and watch as and everyone admires your handmade work of art.
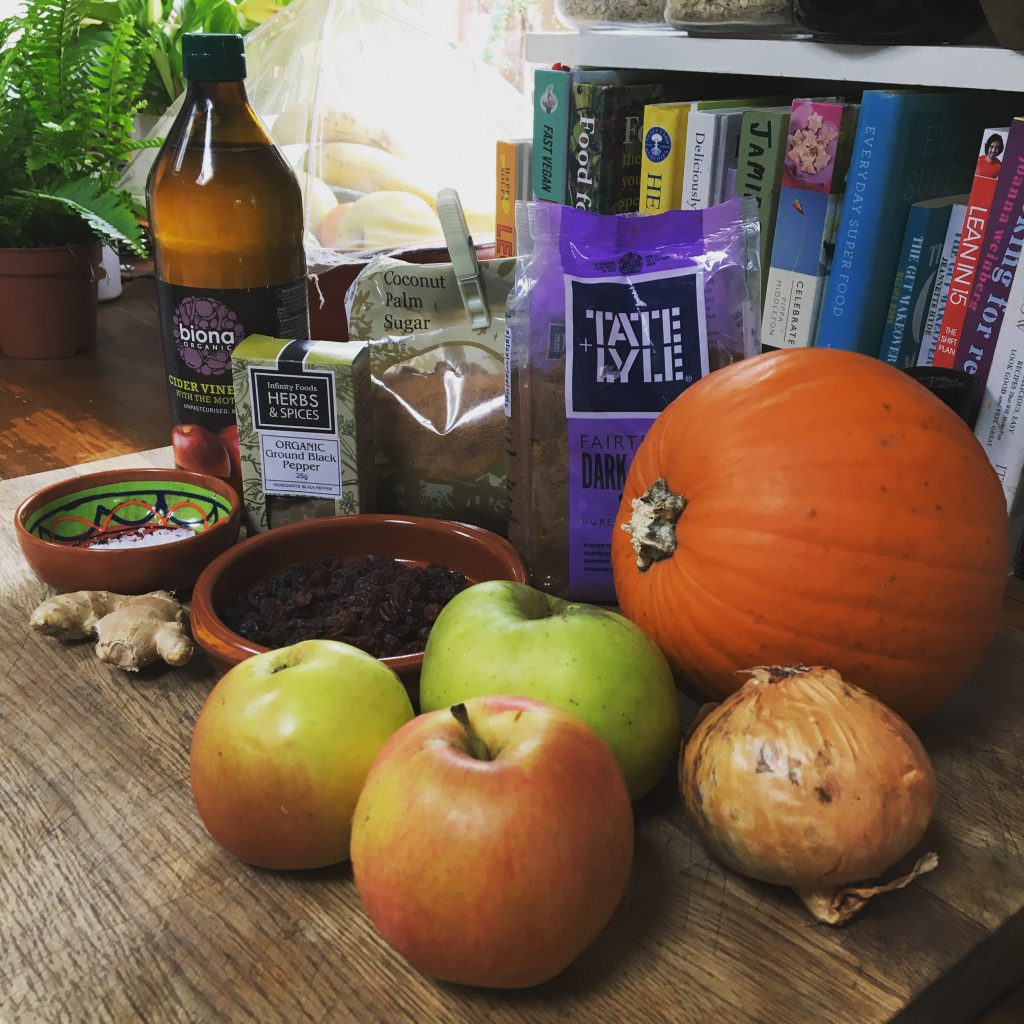
A chunky Christmas classic, this chutney will cheer up a plate of leftovers in no time! It’s a great gift idea for the festive season and batch cooking this treasure means you’ll have plenty left over for your own pantry.
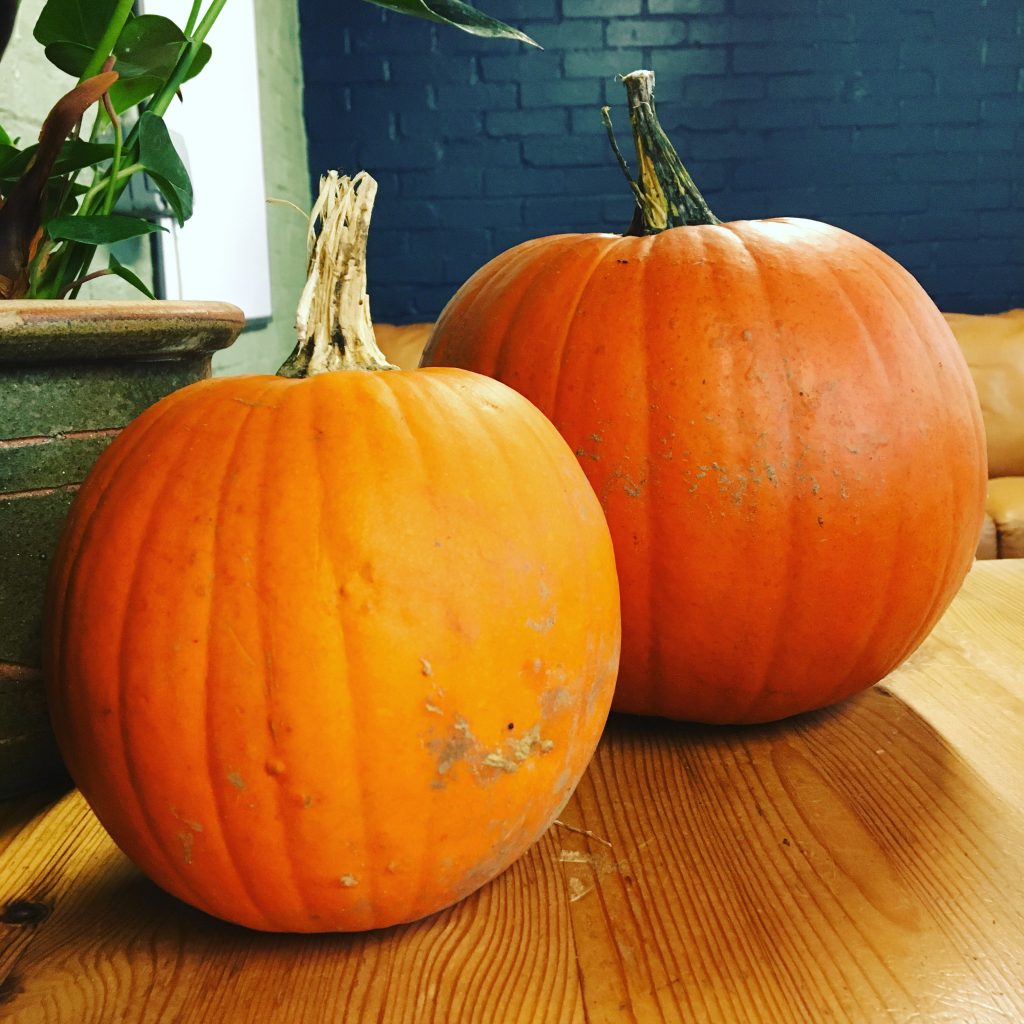
Roasting the pumpkins in the sugar and spices will create a delicious caramelised flavour to add to your base of vinegar, ginger and apples. Your kitchen will smell divine and your final preserve will be spicy, rich and fruity, what’s not to like?
Heat the oven to 190c 375f.
Prepare the pumpkin by peeling it and scooping out the seeds and stringy parts inside (set aside for the compost and dry the seeds to grow later in the year). Cut the flesh into large chunks and place them in a baking tray lined with Greece proof paper.
Sprinkle over the curry powder and soft brown sugar followed by a pinch of salt and pepper. Coat the pumpkin chunks by rolling them around in the sugar and spices. Roast for 20-25 minutes until the pumpkin browns but is still slightly firm. Set aside.
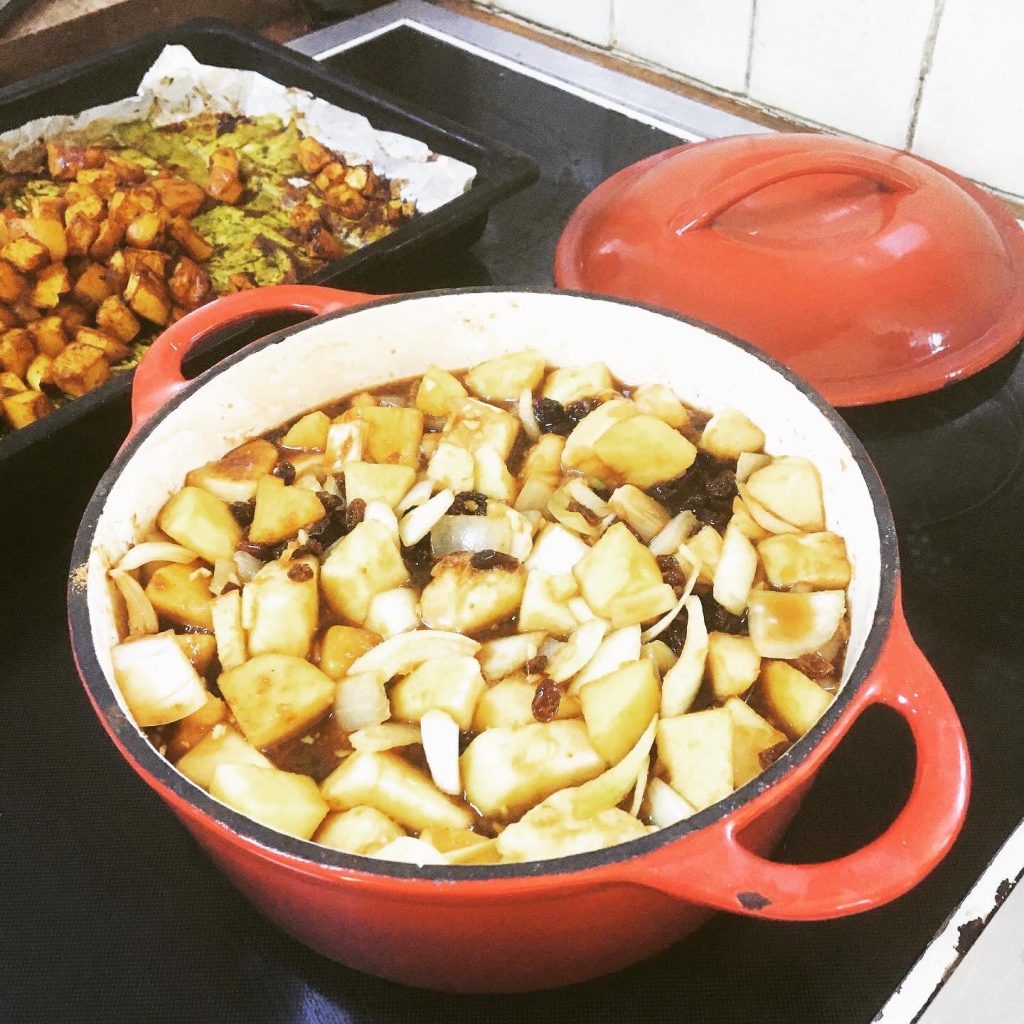
Whilst the pumpkin is roasting, prepare the rest of the chutney by putting all the remaining ingredients into a pan and gently stir with a wooden spoon. Gently bring the mixture to a slow boil and let it simmer there for 20 minutes, stirring occasionally.
Once the pumpkin has cooled, add it to the pan and lower the heat to keep the chunks from turning to mush. Cook for another 15 minutes until the chutney is thick and glossy in texture.
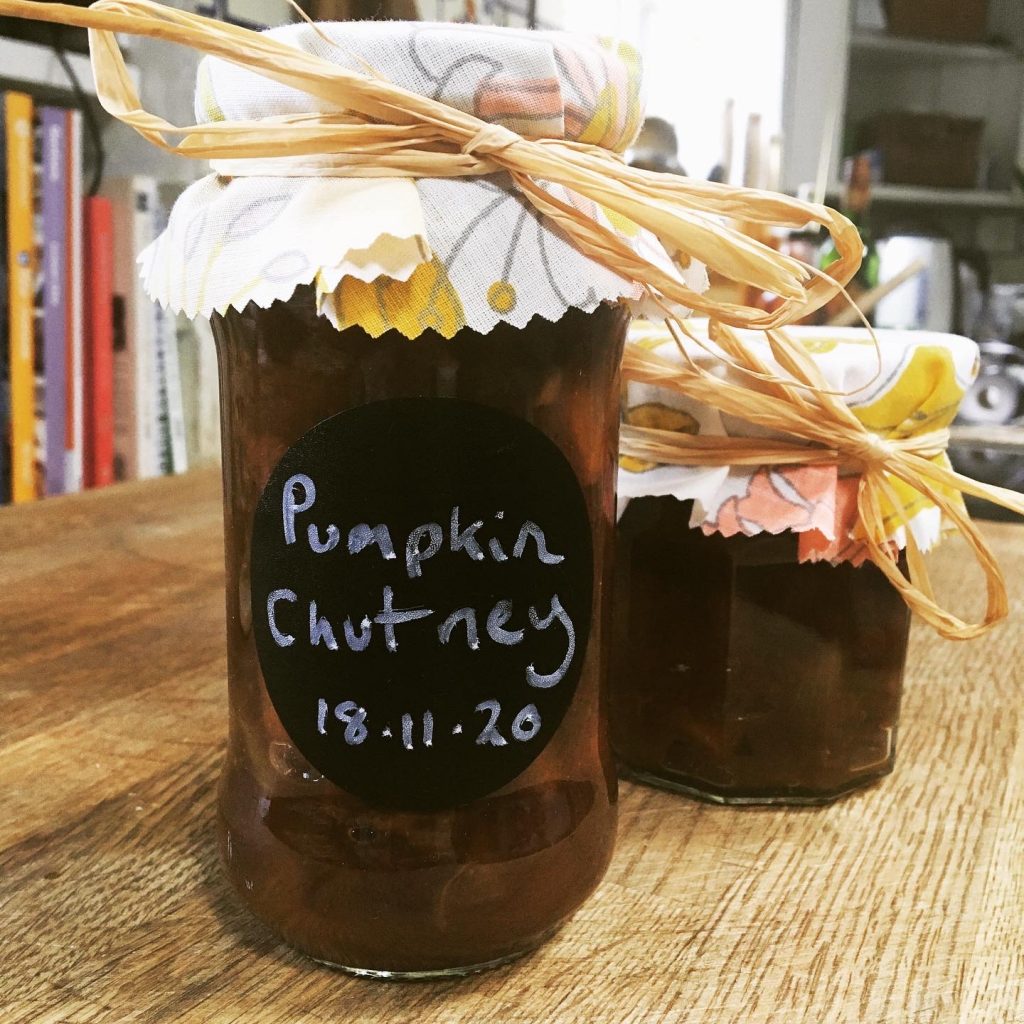
Remove from the heat and, after one last stir, allow the chutney to stand for ten minutes. Spoon the contents into pre-sterilised jars (a run through the dishwasher is enough to do this, or dip them into boiling water with tongs and leave to dry) and leave to cool.
Once cooled, label the jars, decorate the tops with recycled fabric circles tied up with string, and store in cupboard for up to a year. Once opened keep in the fridge and enjoy!
Health benefits of pumpkin chutney:
Source: ‘Healing Foods’ by Neal’s Yard Remedies
Pumpkins help fight inflammation, lower risk of heart disease and stroke, promote bowel regularity, and support a healthy pregnancy
Onions have a powerful antibiotic action, help lower cholesterol, and feed good bacteria in the gut.
Spices possess powerful antioxidant and antibiotic qualities, and benefit digestive health.
Pepper aids digestion, stimulates appetite, helps detoxify the body, eases lung and bronchial infections, relieves shock and stress, and can even halt cancer…respect!
Chillies help remove toxins from the body, help lower cholesterol, reduce appetite cravings, and help clear congestion.
Ginger has powerful anti-inflammatory oils, helps alleviate arthritic pain and reduces symptoms of nausea.
Raisins are an effective prebiotic, feeding good bacteria in the gut.
Apples help balance blood sugar levels, tackle diarrhoea and constipation, help strengthen bones, and help lower cholesterol
Muslin for straining the syrup (and rosehip hairs which irritate)
Directions:
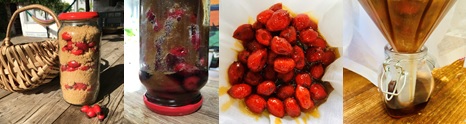
There are many recipes for rosehip syrup which traditionally involve boiling, straining, and deseeding the rosehips, but this method taken from the Woodland Trust uses the rosehips ‘raw’ maintaining all the properties of the hip. It is by far the easiest recipe to follow and is great for novice foragers and strangers to the kitchen. It’s truly a sweet delight!
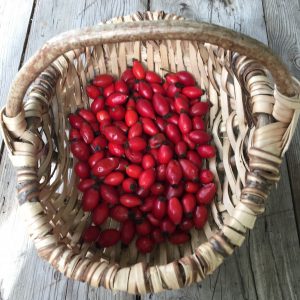
Be sure to know you are picking rosehips when out and about, the elongated shape of the rosehip is a giveaway, but it’s always a good idea to get to know your local hedgerows first. Look out for the dog rose bush earlier in the year so you can return to a spot you know will be laden with rosehips. Pick a basket full of hips then wash them at home, removing the furry ends and stalks with a pair of kitchen scissors. Pierce each hip with a fork and layer them in a sterilised jar, in between layers of sugar, sealing the jar when full. Place on a sunny windowsill and watch it turn into syrup.
Turn upside down every few days to let the sugar cover the hips, drawing out the oils and preserving the goodness. After a couple of weeks, or months, strain the syrup into another sterilised jar through a muslin cloth, this is to remove the fine hip ‘hairs’ which are an irritant. Keep in the fridge, and enjoy drizzled on breakfast cereals, diluted in water, or in a mojito!
Rose in all it forms protects against bacterial infection, helps ease menstrual cramps, has natural sedative properties and can help ease joint pain. The hip is packed full of vitamin C and healing oils that treat inflammation, soothing arthritis and joint pain. It’s iron rich so also great for menstrual cramps, and it’s even good for your heart as it reduces blood pressure and unhealthy cholesterol in the blood. What a tasty bonus!
Homegrown herbal remedies are perfect for reviving a tired gardener, and the healing properties of your herbs can really help during stressful times. As we adjust to ever changing circumstances, your garden can provide a bounty of calming remedies, here are just a few to try taken from a selection of Neal’s Yard Remedies books:
Herbal face and body ‘spritz’
Lemon balm and lavender bath infusion
Headache tonic
Calming peppermint and lavender compress
The refreshing mint in a herbal ‘spritz’ is ideal for hot summer days or nights to help cool the skin. Lemon balm and lavender bath infusion is perfect to sooth the body and mind with its mixture of herbs, petals, and fragrant oils. The headache tonic and compress are both tried and tested for relieving deep tension and migraines.
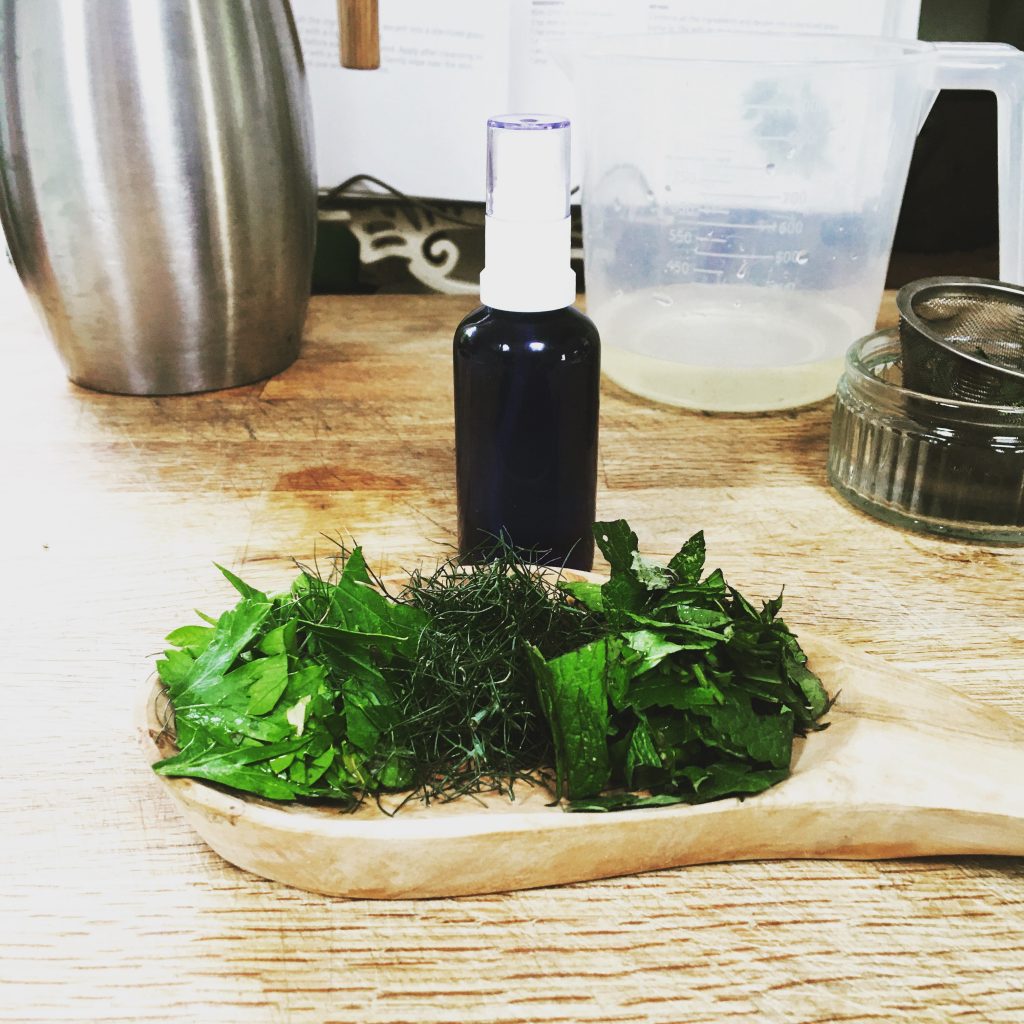
Herbal face and body ‘spritz’:
Fresh Mint (3x heaped teaspoons)
Fresh Dill (1x heaped teaspoon)
Fresh Parsley (1x heaped teaspoon)
Mineral water (85ml / 2 ¾ fl oz)
Make an infusion by chopping up the herbs and adding them to a cup or teapot, boil some water and pour over the herbs using just enough to cover them. Leave to steep for 10 minutes, preferably covered, to avoid the loss of volatile oils in the steam.
Strain infusion before use, add the mineral water and pour into a sterilised glass bottle with an atomiser spray.
Store in the refrigerator to keep it cool, and spray it in a fine mist over exposed skin on the face or body as required. Use within two days.
(NOTE: to sterilize a glass jar or bottle, wash it and its lid in hot water, drain upside down, and put into a cool oven 140 oC/275 oF for 15 minutes)
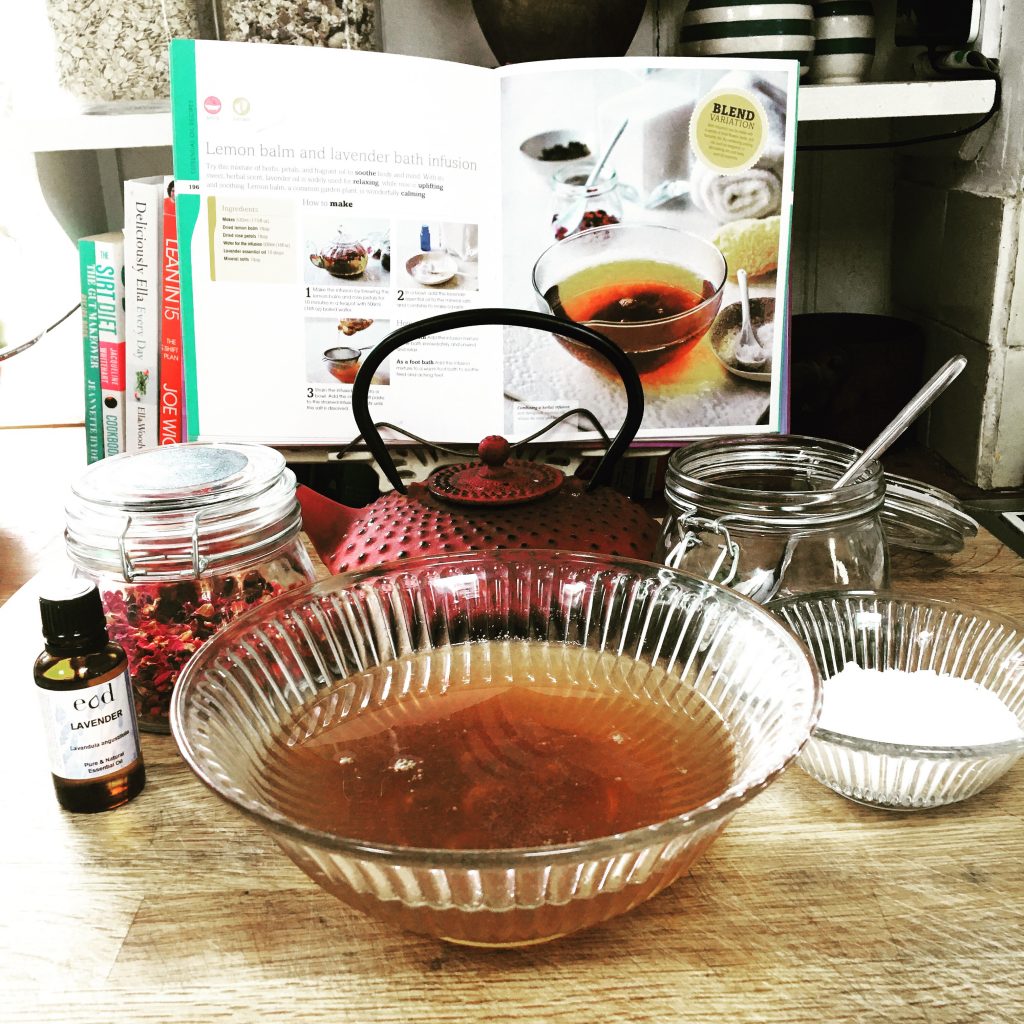
Lemon balm and lavender bath infusion:
Makes 530ml (171/2 fl oz)
Lemon balm (dried, 1x tablespoon)
Rose petals (dried, 1x tablespoon)
Water for the infusion (500ml / 16fl oz)
Lavender essential oil (10 drops)
Mineral salts (1x tablespoon)
The sweet herbal scent of lavender oil is widely used for relaxation, while rose is uplifting and soothing. Lemon balm, a common garden plant, is wonderfully calming.
Make the infusion by brewing the lemon balm and rose petals for ten minutes in a teapot with 500ml boiled water
In a bowl, add the lavender essential oil to the mineral salts and combine to make a paste
Strain the infusion liquid into a bowl. Add the oil and salt paste to the strained infusion and stir until the salt is dissolved
How to use:
In the bath Add the infusion mixture to the bath immediately and unwind and relax.
As a foot bath Add the infusion to a warm foot bath to soothe tired and aching feet
Headache tonic:
Apple cider vinegar (2x tsp)
Honey (2x tsp to taste)
This natural remedy with all its nutrients will help to ease the symptoms of a headache and support healing.
Fill a small glass with tepid water and add 2 teaspoons of apple cider vinegar, and two teaspoons of honey to taste.
Stir, and drink to relieve symptoms of a headache.
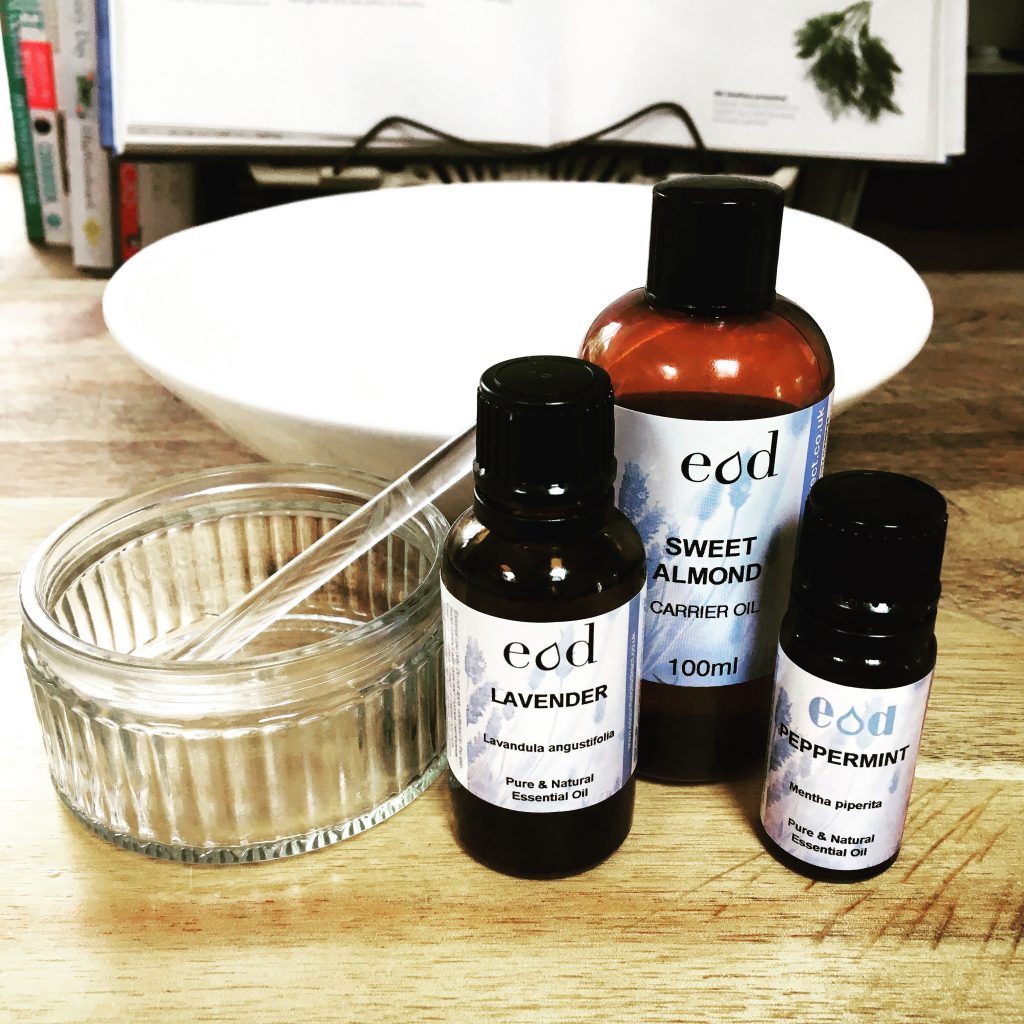
Calming peppermint and lavender compress:
Makes 1 compress
Almond oil (1x teaspoon)
Peppermint essential oil (3 drops)
Lavender essential oil (2 drops)
The stimulating properties of peppermint have long been used in aromatherapy for treating tension headaches, as it seems to cool and refresh the mind. Lavender is also well known its relaxing qualities, and is well known to help bring relief to headaches caused by anxiety and stress.
Fill a bowl with warm water. Add the essential oils to the almond oil, then add to the water
Soak a flannel in the bowl, then remove and squeeze out the excess water
Place the compress on the forehead. Leave the flannel in a place while it cools to body temperature, repeat the process three times.
Mid summer marks a time for celebration at the garden, as the flowers bloom and the vegetables grow, we can finally put up our feet and begin to enjoy the fruits of our labour.
Usually, we would be planning a party on the plot, but this year we encourage everyone to pick a favourite spot outdoors, set up a picnic and refresh the senses with some home-grown delights.
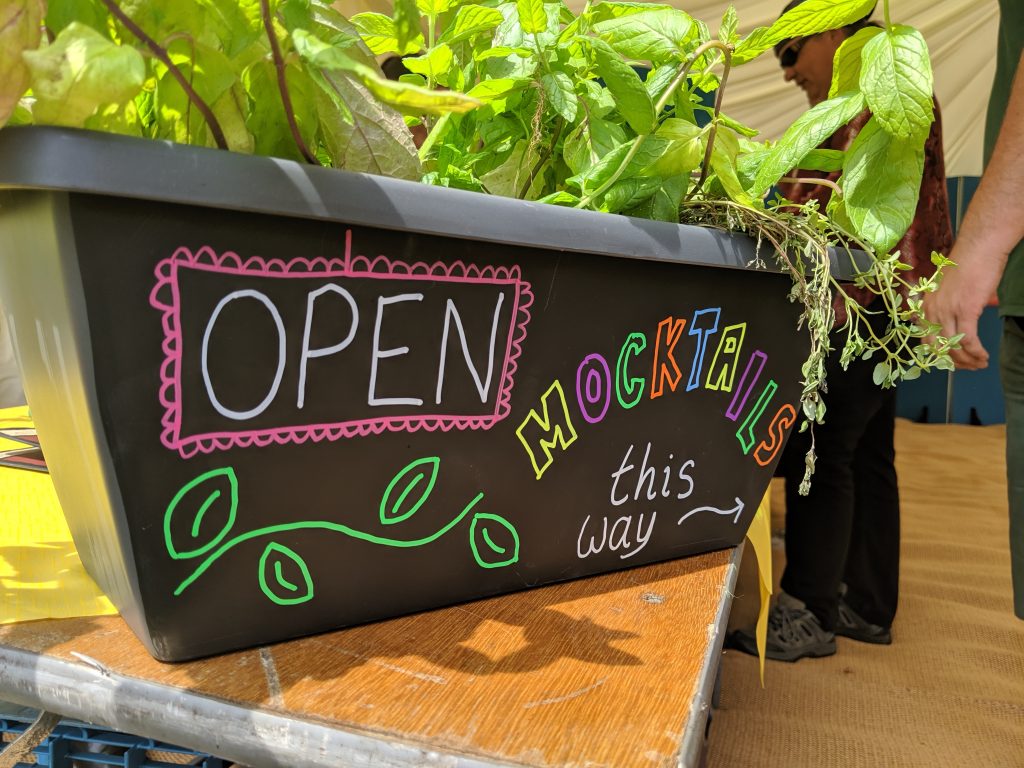
Here we have listed some uplifting and calming teas made from our very own flowers and herbs, and suggested some refreshing ‘mocktails’ to mix, complete with edible flower ice cubes to bring some cheer to your glass.
Home Grown Mint Mojito Mocktail
Teas:
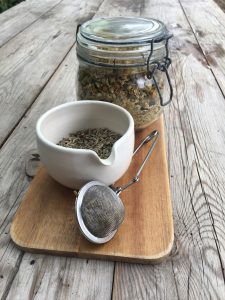
Generally, when making herbal teas, it is necessary to prepare your tea mixes in advance by harvesting and drying your herbs, ideally in a dehydrating machine overnight, or by hanging them upside down in bunches somewhere warm until they are completely dry (make sure they don’t go ‘musty’ in the middle).
When dry, crunch leaves such as nettles and lemon balm into smaller tea leaves and store them in airtight jars mixed with your selected flowers and peels. Then label and enjoy your mid summer flavours late into the year.
As a rule, when adding your tea mix to the teapot, use one teaspoon per person and ‘one for the pot’. Then add your boiling water and leave to ‘steep’ for five minutes. Some pots have a built in vessel for holding the tea leaves in place when pouring, or you can use a separate strainer to catch the leaves and prevent them from falling into the cup.
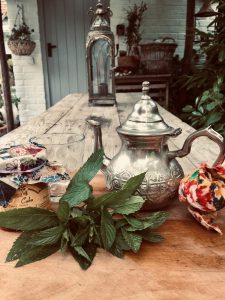
A Moroccan teapot is designed so that you can put whole springs of mint leaves directly into the pot, and they will not make their way down the spout. It’s best to make mint tea with fresh leaves rather than dried, for an extra fresh flavour. Add honey to sweeten either to your pot or cup directly.
If you don’t have a teapot, use an individual tea strainer submerged into your cup of hot water. Leave to steep and remove before drinking, then relax and enjoy the taste of your homegrown teas whilst reaping the benefits of their healing properties.
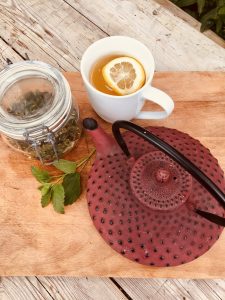
Mint and Honey Tea
You will need:
Mint – fresh from the garden
Honey – local organic honey is the best
This is such a simple and delicious blend, just pick the top 5 leaves from your fresh mint plant and add a handful to your pot. Steep for 5 minutes and add 1 teaspoon of honey to your cup to taste. There are many varieties of mint to try, from sweet mint to spearmint flavour, so have fun with experimenting with what works for you.
Lemon Balm and Grapefruit Tea
You will need:
Lemon balm (a few large handfuls, pre-dried)
Grapefruit rind (1x grapefruit rind grated and pre-dried)
Ginger (1x teaspoon, freshly grated, added to cup to taste)
IF YOU ARE ON MEDICATION PLEASE CHECK WITH YOUR DOCTOR IF YOU ARE ABLE TO CONSUME GRAPEFRUIT – AVOID IF ON MEDICATION FOR EPILEPSY AND ANXIETY.
To make a brew of lemon balm, grapefruit (peel) and fresh ginger tea, mix your dried ingredients together and store; when ready add I teaspoon per person to your pot plus one teaspoon for the pot, add your boiling water. Steep for 5 minutes, pour, and add approximately 1 teaspoon of grated fresh ginger direct to your cup to taste. Stir and enjoy.
Chamomile and Lavender Tea
You will need:
Chamomile flowers (handful of heads – pre-dried)
Lavender flowers (handful of flowers – pre-dried)
To make a Chamomile and Lavender infusion from your dried flower heads, just add a teaspoon of chamomile flowers into your strainer, with half a teaspoon of lavender flowers and leave to steep in your cup for 5 minutes. Top up with a bit more hot water and enjoy this soothing blend.
Healing benefits of your tea blends:
Lemon balm – great for anxiety and insomnia, a digestive also, perfect for a bedtime brew. Lemon balm is also in lots of natural anti depressants so helpful during bouts of anxiety.
Grapefruit – appetite stimulant, great for removing fatty deposits, helps to regulate the appetite so is helpful for people dealing with weight issues. Grapefruit is also a detoxifier, so good for a hangover, and regulates sleep hence used by people who travel a lot. It also helps to focus and clear the mind, so great during exam time.
Ginger – good for nausea and sickness, generates heat in the body, great for people who do too much; a cup of ginger tea is stimulating yet grounding, leaving you active without the need for caffeine. It is also excellent for muscle cramps, post exercise recovery, and during menstruation.
Mint – stimulating and refreshing, helps to boost your metabolism and aids digestion. Mint is anti-inflammatory and helps open the airways, so great for asthma sufferers and for general cough and cold remedies.
Honey – natural antiseptic, antihistamine, and general all round brilliant healing super-food. Put direct onto skin for cuts and boils, it is also an antidote for bee stings (after removing the sting). Great for gardeners!
Chamomile – sedative, relaxing, and useful for sleep remedies because of its calming effect. It is soothing to the skin and can be used as a compress on scalds. It’s also good for the digestive system and helps relax the stomach.
Lavender – calming, good for sleep, a sedative for the nervous system, perfect for relieving worry, stress, and migraines. Use in combination with lavender flowers mixed with rice in an eye bag placed over the eyes at night to encourage relaxation and a good nights sleep.
Mocktails:
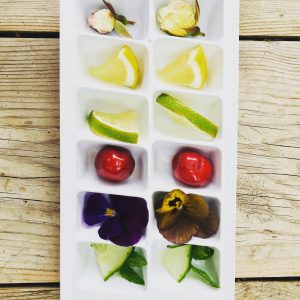
Ice cube tray preparation:
Prepare ice cubes by placing edible flowers from the garden into ice cube trays. Make sure there are no pests on your petals or flower heads and be sure to use plants you know are safe to eat and haven’t been sprayed with pesticides.
Alternatives to flowers are small slices of lemon, lime, cucumber or frozen berries, which are available all year round from the shops. Arrange a selection of colourful flowers, fruits and berries into your tray, add water and freeze.
If using mint, pick the tiny top three mint leaves fresh from a spring of growing mint to add a refreshing zing to your cubes. Add water to your tray and place in the freezer.
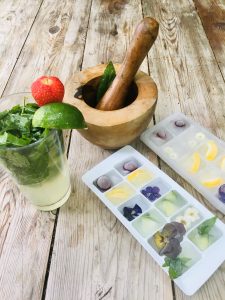
Virgin Mojito
You will need:
Mint (handful of sweet mint per serving, third of your glass)
Limes (1x per serving cut into wedges)
Cucumber (chopped finely, with mint leaves, frozen in ice cubes)
Golden caster sugar (1x teaspoon per serving)
Sparkling Water (instead of rum and soda water)
Pestle and mortar
Tall glass
Spoon for stirring
Prepare ice cubes by finely chopping cucumber and mint leaves together, then add a teaspoon of your mix to each ice cube tray compartment, topping up with water. Place in the freezer until you are ready to mix your ‘mocktail’.
To make your virgin mojito, place half of your mint in a pestle and mortar, and put the remaining sprigs in a tall glass. Cut your lime into four wedges and squeeze three into your pestle and mortar. Muddle the mint, lime, and sugar together (crushing with the pestle), pour all the mint and liquid into your glass.
Add the used lime wedges to your glass (for extra flavour), then add your ice cubes and top up with your sparkling water, giving the mix a stir. Place you remaining wedge of lime onto your glass rim for decoration and enjoy your refreshing and delicious mojito ‘mocktail’!
Maiden Moon Walk
You will need:
Grapefruit (one slice for decoration on glass)
Grapefruit juice (a dash per serving, or freshly squeezed)
Sparkling water (instead of Prosecco)
Ginger (grated – a teaspoon)
Flower ice cubes (violas, rose bud, pansies, borage flowers)
When ready to make your Maiden Moon Walk, choose a pretty cocktail glass and slice your grapefruit in half. Squeeze one half of your grapefruit into your glass filling it a quarter full (you can use bottled grapefruit too). Take a slice from your remaining half grapefruit and save for decoration.
Grate a teaspoons’ worth of fresh ginger into your glass. Add a teaspoon of sugar and mix, then drop in your ice cubes, place the slice of grapefruit on the rim of your glass like a giant moon decoration, and relax and enjoy your lunar landing!
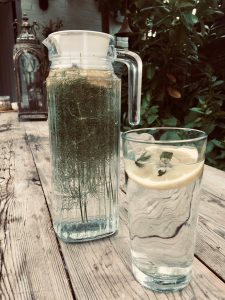
More options:
Another simple and refreshing drink to serve at any party on the plot is fresh dill in a jug of water. Add a couple of slices of lemon, and some pretty ice cubes you prepared earlier (lemon and lime works well) and off you go. Your visitors will love the taste of summer in a glass!
Healing benefits of your ‘mocktail’ mixes:
Mint – stimulating and refreshing, helps to boost your metabolism and aids digestion. Mint is anti-inflammatory and helps open the airways, so great for asthma sufferers and for general cough and cold remedies.
Lemon and Lime – both of these are great immunity boosting citrus fruits, so again fabulous for staving off coughs and colds.
Grapefruit – appetite stimulant, great for removing fatty deposits, helps to regulate the appetite so is helpful for people dealing with weight issues. Grapefruit is also a detoxifier, so good for a hangover, it also regulates sleep hence used by people who travel a lot. It also helps to focus and clear the mind, so great during exam time.
Ginger – good for nausea and sickness, generates heat in the body, good for people who do too much; a cup of ginger tea is stimulating yet grounding, leaving you active without the need for caffeine. It is also great for muscle cramps, post exercise recovery, and during menstruation.
Dill – is great for digestion, including loss of appetite, and good for treatment of coughs and colds, cramps, and sleep disorders amongst other things, so and all round fabulous plant, great with fish dishes too.
During any extended periods of time at home, it’s always good to surround yourself with plant life. A sunflower growing at the bottom of the garden can bring such joy, and nurturing aromatic and tasty herbs on your windowsill can bring even more satisfaction. All you need is a pack of seeds and a handful of compost and off you go! No outside space, or stuck without a pot? Here’s how to convert some household objects into planters without the hassle or expense of visiting the shops.
Newspaper Pots
You will need:
Newspaper
Tin can
Compost
Seeds
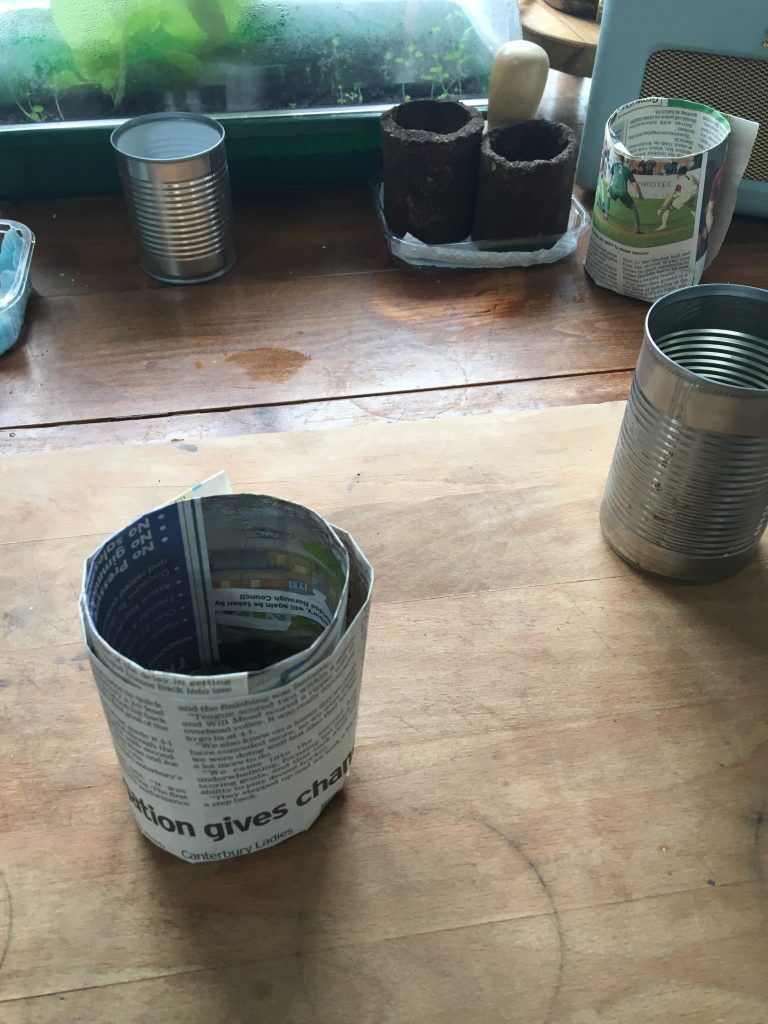
Making paper pots out of newspapers is fun and a great way to recycle. Once the pots are made, you can plant them up and wait for your produce to grow, place the pots directly into the ground without having to disturb your plants. Easy, so lets give it a try.
Find an old newspaper and take one sheet out
Fold length ways so you have a long strip of newspaper
Take a recycled tin can (with lid removed) and place the solid end along the folded edge of the newspaper
Wrap the paper loosely around the tin and roll around until you have a tube around the tin
Fold one edge of the paper into the hole of the tin
Remove the tin from its sleeve
Put the tin, flat end first, back into the paper pot and squish the paper flat inside the pot
Ta da! Your pot is ready to fill with compost
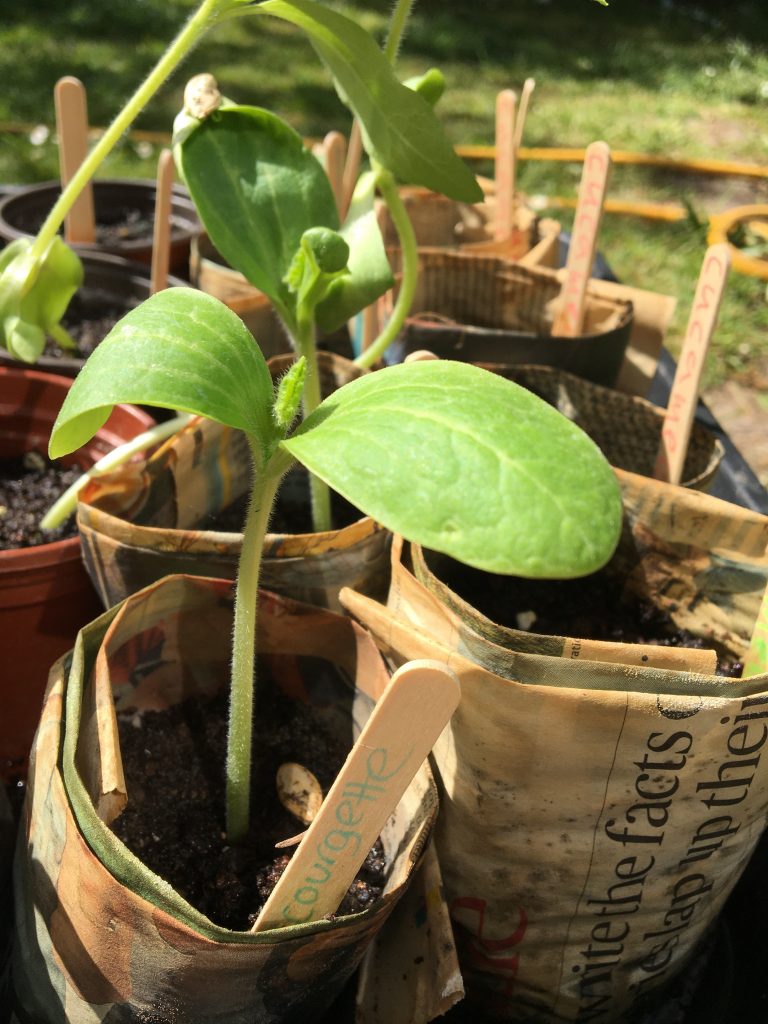
Water your pot, then plant up with seed (sunflowers or beans are good) and cover with a thin layer of compost
Water again and place in a warm sunny spot, keep moist
When your plants have grown and are ready to plant outside, place the entire pot into the soil, the paper will break down and your plants will grow happily out of the pot
Fabric Tin Can Planters
You will need:
Tin cans
Hammer & Nail
Doubled sided sticky tape
Recycled fabric (in strips)
Scissors
Compost & Seeds (seasonal herbs or bulbs)
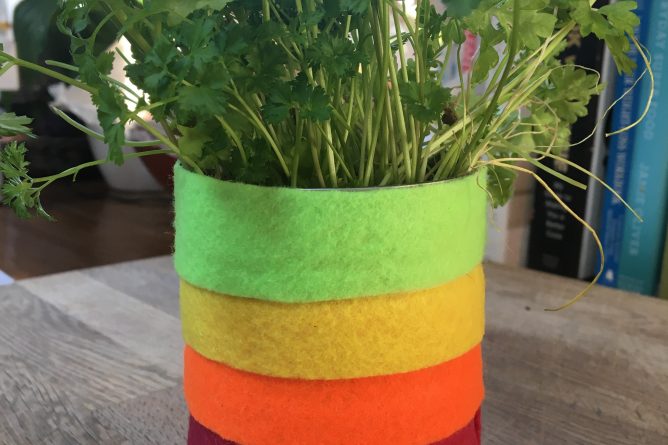
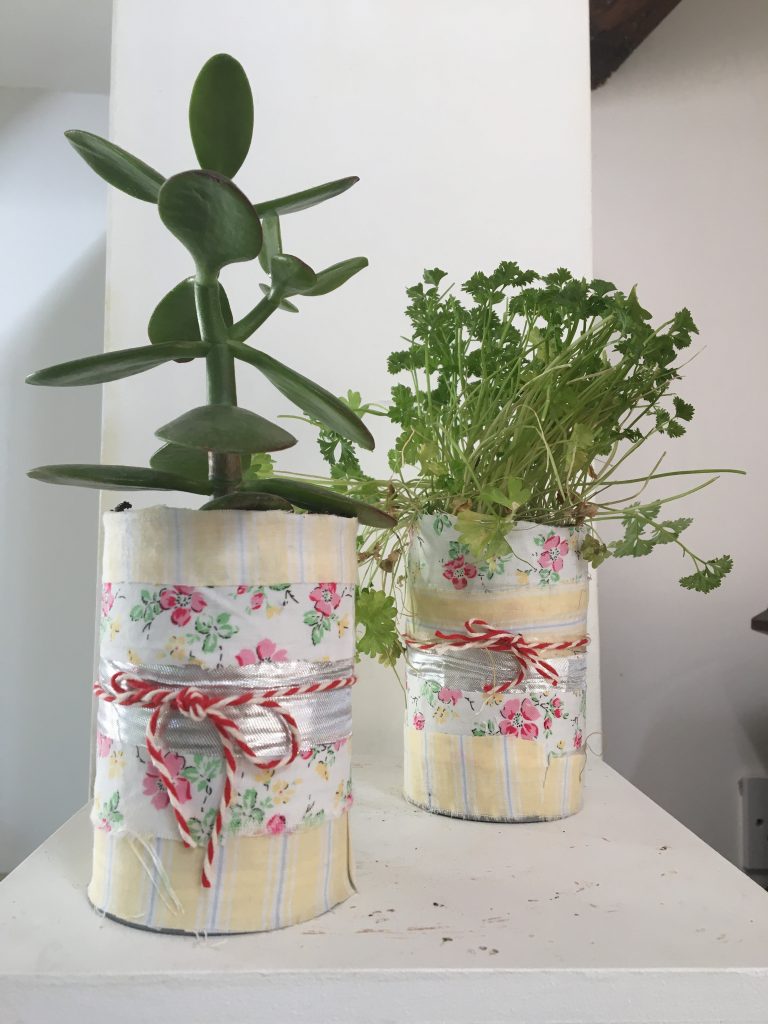
Brighten up any windowsill with these easy to make recycled fabric tin planters. Perfect for growing herbs or spring bulbs in on a budget and great for the environment too.
Wash out your used tin cans, remove any paper labels and bang two or three drainage holes in the bottom using a hammer and nail (on a work surface like a chopping board).
Cut some old fabric into strips about 2cm thick and long enough to wrap around your tin. They don’t have to be neat.
Stick a strip of double sided sticky tape around the tin at the bottom of your tin can, cut to make a sticky ring all around.
Add one strip of fabric on top of the tape, cut off any excess fabric so each end meets.
Add another layer of sticky tape above your fabric and overlay another strip of fabric in another colour for contrast, trim and make sure you don’t leave a gap between the first and second fabric strip, each strip should overlap the one before.
Repeat the process all the way up the tin until you reach the top, trim any excess fabric around the top edge, or fold the fabric over the top if the edge is sharp, being careful to stick it down with a layer of tape first.
Add decorations to finish your multi fabric masterpiece! Wrap string around it and tie in a bow, add ribbon or glue on buttons, let your creativity shine.
Now your planter is ready to plant; add seed compost to the tin, water, then sprinkle your herb seeds, or plant a Spring bulb following the packet guidelines. Cover with another layer of compost, water again and keep in a warm sunny spot watering regularly. Then see your creation come to life!
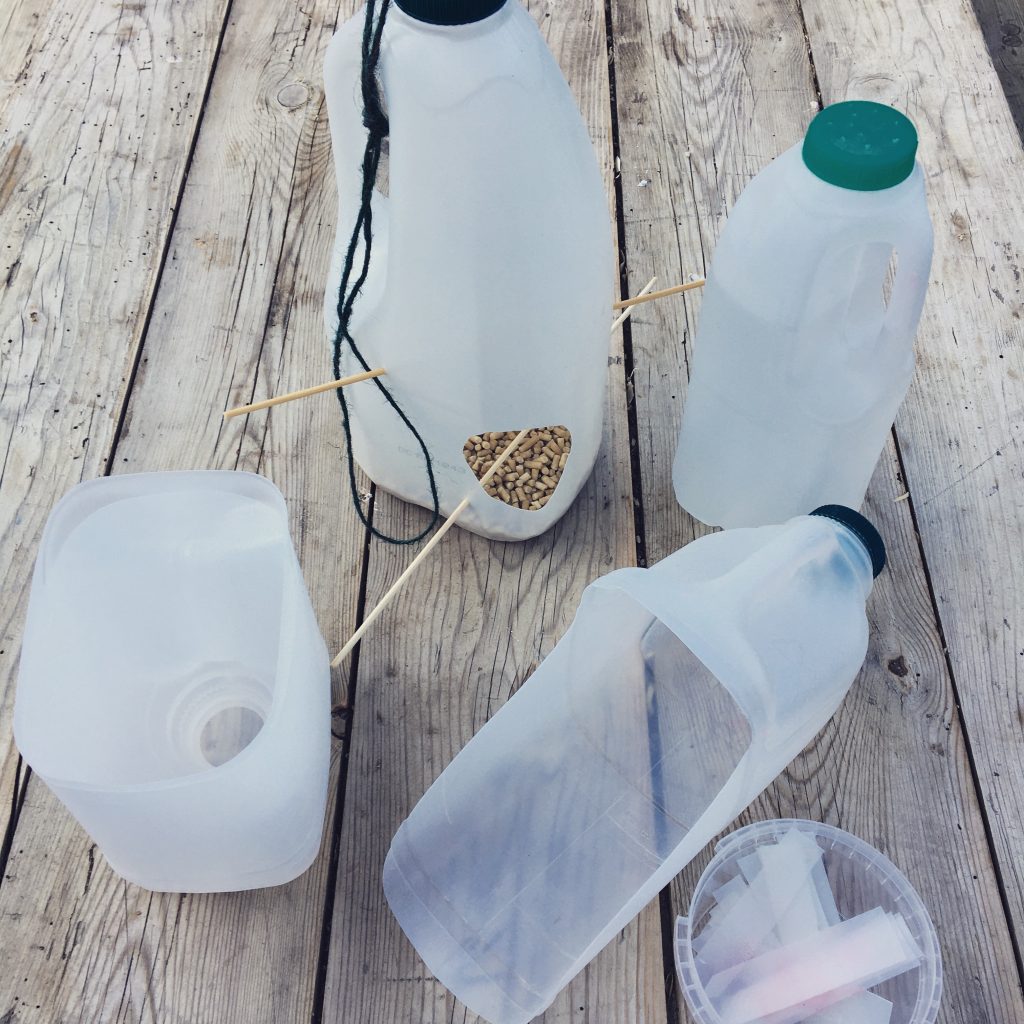
Recycled Milk Bottle 5x Ways
You will need:
Plastic Milk Bottles (x5)
Craft Knife
Hammer & Nail (or sharp pointed object like a scewer)
Compost
Seeds – bird seeds and herb seeds to plant
Marker pen
Kebab sticks
String
Making a new use for any object is fun, but making five uses out of your used plastic milk bottles is incredible!
Bird feeder
Draw a large circle on the bottle to make a hole to let birds inside to feed on the seed (at least 2 cm from the bottom)
Carefully cut the hole out using a craft knife
Screw a smaller hole underneath the big hole
Insert a kebab stick into the small hole to act as a perch for the birds to land on
Screw a hole through the lid of the bottle, feed an arms length of string through the hole, and tie several knots in the end that screws inside the bottle
Loop the other end of string and tie so you have a loop you can hang on a tree branch or hook outside
Screw the lid on the bottle
Fill the base with birdseed, its ready to go!
Sprinkling watering bottle
Remove the lid from your bottle and place over something soft like a cushion, screw side up (to ensure a good flow)
With a screw or hammer and nail, make several small holes in the lid for the water to sprinkle out
Fill the bottle with water
Screw the lid back on and you have a practical sprinkling watering bottle to place near your plants, this is especially good for seedlings and your plants that need delicate watering
Scoop
Place your water bottle on its side with the handle facing up
Draw a scoop shape around the bottle starting from the top edge of the bottle, half way along, down in a rainbow shaped arch to the bottom edge of the bottle at the base
Cut along the top edge to meet each scoop shaped arch
Job done, you have a scoop perfect for filling your pots from the compost bag
Plant labels
With any spare plastic you have, utilise for plant labels by cutting into strips about 1cm wide by 8cm long (finger size)
Trim one edge to a point and set aside for your planting projects
Use a marker pen to label your pots so the plant names do not wash off when watering
You have a invaluable stash of plant labels at your fingertips!
Self-draining planter
Cut a milk bottle around its centre in half carefully using a craft knife
Remove the lid from the bottle and turn the milk bottle top half upside down
Place the top half of the bottle back into the bottom half of the bottle, so the bottle ‘mouth’ is face down at the bottle base
You are ready to fill the container with compost and plant some seeds! When you water, the water will collect in the base and your plant will be happy and stay moist
Good luck with making these, and send some lovely photos to kentcog@kent.ac.uk


 Lemon balm and lavender bath infusion: