Category Archives: Adventures in audiovisual digitisation

Adventures in audiovisual digitisation* (part 3)

*Not really digitisation, more digital transfer

Because many of our depositors (comedians, promotors and producers) have worked on television and radio we have been given copies of their contributions to these programmes as part of their collections.  Material has been deposited on CD (both audio cd and CD-R), and on DVDs. This material is usually contributor copies that they were given by the broadcaster or production company, although we do have a few ‘off-air’ recordings. We’ve also received published material, such as recordings of specific shows, tours, or compilations the depositor has appeared on, including in cassette, audio CD and DVD formats.

In this post I will focus on how we are capturing audio and video material deposited on CD and DVD, which Richard Wright nicely describes as ‘digital content not in files’ (page 9). ‘Digital content not in files’ refers to digital recordings which require specific technology and workflows to move the sound/images from their dedicated physical carriers (such as DAT, minidisc, and DV formats, as well as material held on optical media, such as audio CDs, CD-R and DVDs) into digital files (page 3).
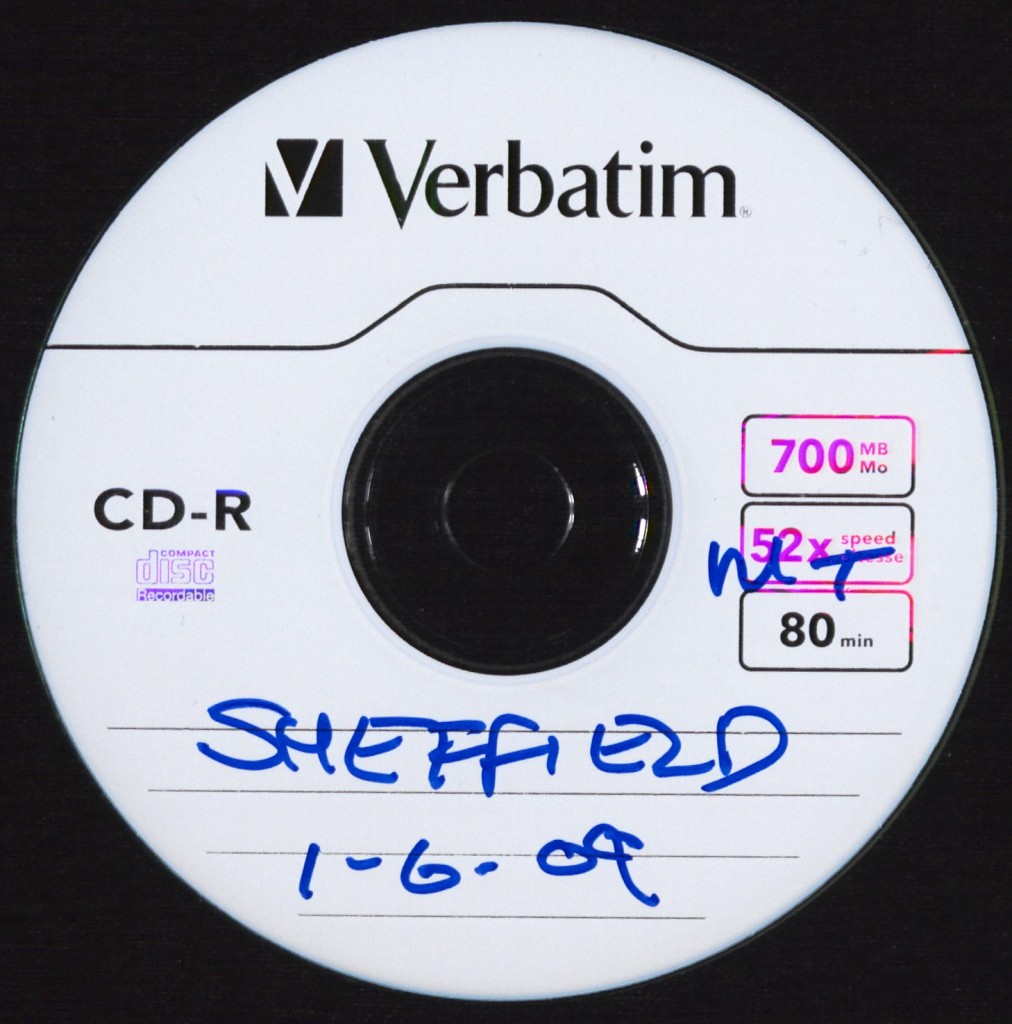
CD from the Mark Thomas Collection of a recording from the Sheffield leg of his 2009 'It's the Stupid Economy' tour

CD from the Mark Thomas Collection of a recording from the Sheffield leg of his 2009 ‘It’s the Stupid Economy’ tour

Whilst previously optical media was seen as a preservation medium and storage solution, it is now recognized that optical discs are an ‘at-risk’ format (see ‘An Introduction to Optical Media Presevation’ by Alex Duryee’) and so we have been transferring any material of high priority deposited on optical media (mostly that which is unpublished on re-writable discs) to a digital file.

Our approach to this material has varied depending on the format.  For material on audio CDs and CD-R we have viewed the physical format as a file carrier, as a way to share and transport audio files, and we view the content on the disc as the important thing to capture (rather than the structure on the disc).  However, for DVDs which are more structured (often with a menu) we have created a disc image, which we can then mount in tools such as VLC.

Audio CDs (Compact Disc Digital Audio / CD DA)

Audio CDs hold data in the Compact Disc Digital Audio (CD DA) format. Data is written in the pulse-code modulation stream (PCM), at two channel, 16 bit, and 44.1kHz. When an audio CD is placed in your disc drive the operating system will interpret the data into different files (tracks) with the extension .cda.

After consideration we decided not to extract audio from audio CDs using a disc imaging workflow, but to extract the data and save as a WAVE file. We made this decision based on a number of factors.

  1. Firstly, it was the audio data itself which was important to us, rather than the structure of the disc.
  2. Secondly, because the discs we had were uncomplicated; many of the audio cds contained only two .cda files (one of which was often a radio tone/test track) or were collections of edited tracks from live shows put onto a CD (but not published). Note that we prioritised material deposited on ‘unpublished’ (often re-writable) CDs and DVDs; we have not transferred any material deposited which has been published and is on mass replicated discs.
  3. I think it would also be honest to say that, thirdly, disc imaging audio CDs seemed rather complicated and unnecessary for a relatively small number of discs within our collection.  I’m slightly ashamed to say that this goes against the guidance provided by avpreserve, the open preservation foundation, and the DPC/British Library, and I would gladly be corrected if the digital preservation and archiving community thinks we should change our workflow! I would also be interested to hear from other small archives who are undertaking this sort of work, and whether they have disc imaged their CDs or taken a similar route to us.

Instead of disc imaging we extracted audio data using Adobe Audition (a tool we were using for digitising our sound cassettes and MiniDiscs) and set the read speed to be low in order to provide as accurate results as possible. The data was originally written to the disc as PCM 16 bit/44.1kHz so we extracted the data as this and used the WAVE (.wav) wrapper. The structure of the audio CD disc was maintained using filenames (numbered sequentially by track on the disc) and through metadata which we embedded in BWF format (using the BWF MetaEdit tool).

We have also received CD data discs containing mp3 files. Although mp3 is not an archival format the sound files are already compressed and saving them as wav files will only increase the file size, but not the quality of the file. MP3 is a format widely used it is unlikely to become obsolete in the immediate future and so poses no preservation risk. We have also been capturing MP3s through audio editing software, either Adobe Audition or Audacity. We are exporting through software, rather than copying straight from the disc, as the software you use will have an error correction element and help prevent any errors during the export/copy.

DVDs

With rewritable media accessioned into the British Stand-Up Comedy Archive collections (such as hard drives, floppy drives), or media which has inbuilt menu functionality (i.e. DVDs), we thought that here it was important to create a disc image, a sector-by-sector copy, as part of the process of digitally preserving the original accession. Our aim was to:

  • Ensure that the disc/drives are free from viruses
  • Capture an ‘image’ of the disc/drive, showing the structure of the files (including folder structure) on the original disc as it was when deposited with BSUCA.
  • Secure the contents of the disc/drive (i.e. the documents/files on the disc itself)

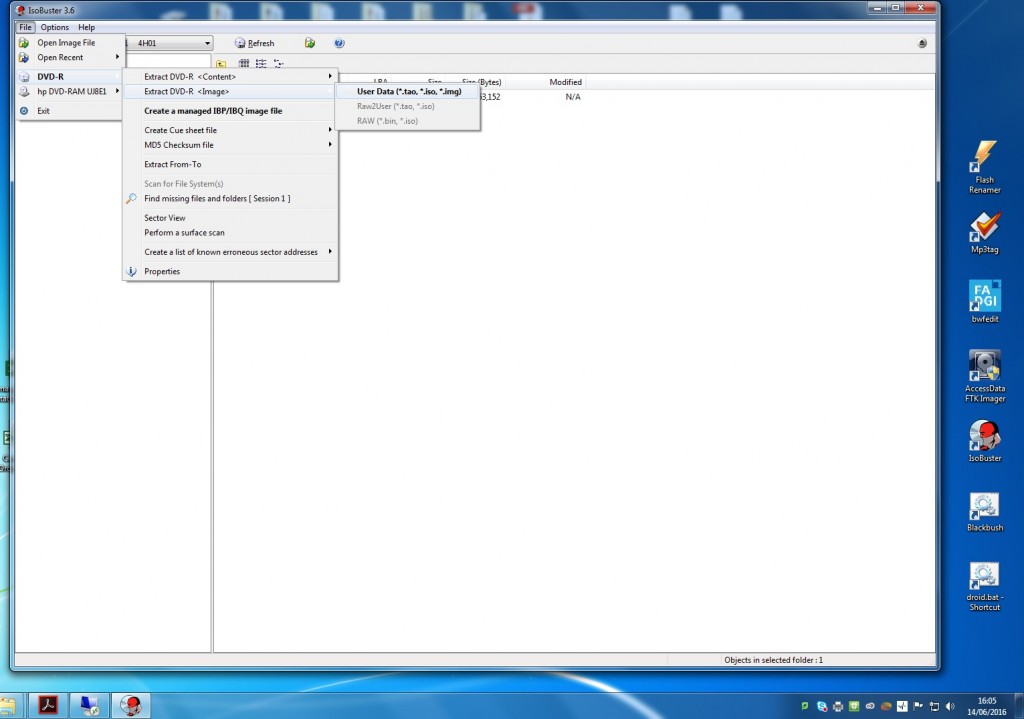
We have used the free version of ISOBuster to image DVDs and using this tool created an .iso file and a .cue file.  A complete disk image (.iso file) serves as the preservation master, and from the iso file we have then created an access copy as an mp4 (h.264) file, using VLC, for use in our reading room.

Creating disc images of DVDs using ISOBuster

Creating disc images of DVDs using ISOBuster

Next time… how we have been digitising VHS and transferring material on DVCam and MiniDV.

Further reading and helpful links

‘Preserving Moving Pictures and Sound’, Richard Wright, DPC [Digital Preservation Coalition] Technology Watch Report 12-01 March 2012, http://dx.doi.org/10.7207/twr12-01

‘An Introduction to Optical Media Presevation’, Alex Duryee, AVPreserve, http://www.avpreserve.com/wp-content/uploads/2014/04/OpticalMediaPreservation.pdf

‘Developing a Robust Migration Workflow for Preserving and Curating Hand-held Media’, Angela Dappert, Andrew Jackson, Akiko Kimura http://arxiv.org/ftp/arxiv/papers/1309/1309.4932.pdf

‘Establishing a Workflow Model for Audio CD Preservation’, Tonisant, Open Preservation Foundation blog, http://openpreservation.org/blog/2013/11/19/establishing-workflow-model-audio-cd-preservation/
Adventures in audiovisual digitisation (part 2)

Following on from my last post I thought I would provide some information on the equipment that we are using for the digitisation (or capture) of audio held on various audio formats. As stated before, we have had to compromise in various areas:

  • We have purchased second-hand equipment as that way it is possible to use semi-professional equipment. There were no newer models, within our budget, for semi-professional use, only those created for domestic purposes (which didn’t have XLR connectors or noise reduction settings for example).
  • We have borrowed or been given equipment from other departments around the University, no longer used by that department due to its obsolescence, but perfect for the requirements of our project.
  • And we have had to outsource some digitisation (so far of DAT and U-Matic).

Audio cassettes

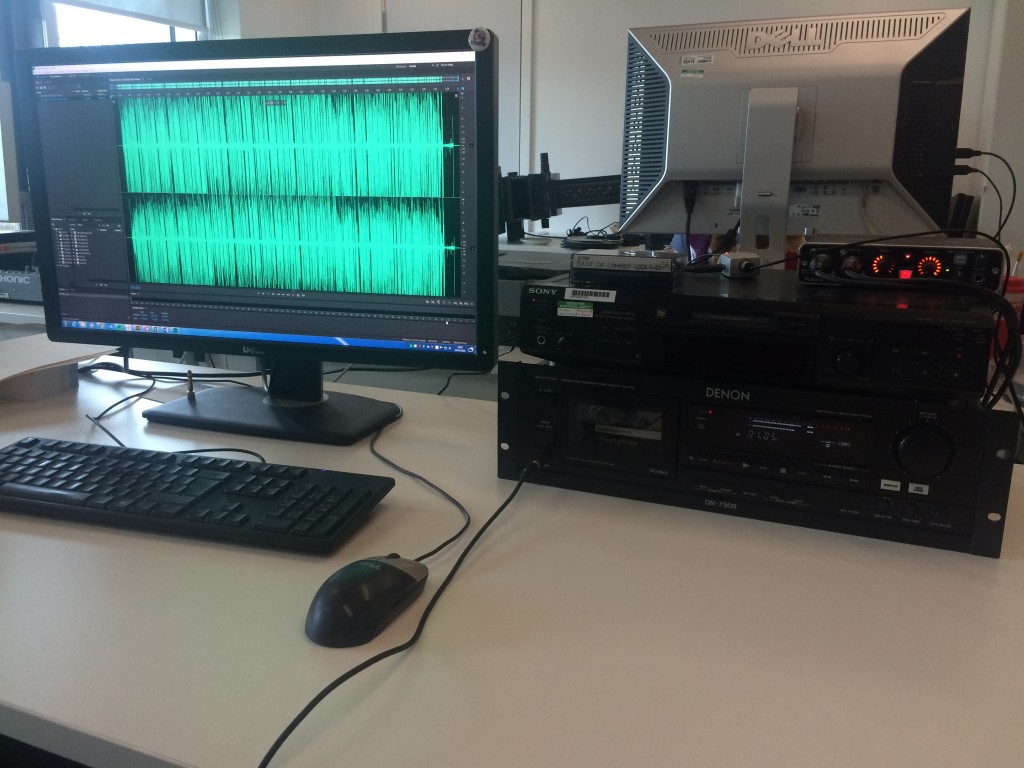
  • Cassette Deck: We are using the Denon DN 790-R. After lots of research I chose this as an it was affordable option for a semi-professional cassette deck, and it was a deck that I could actually find for sale at the time I was looking (we paid about £300 for one off of Ebay). I was looking for a deck which had XLR connectors and a variety of dolby noise reduction settings. Best practice (for example see Sound Directions, page 20 or Digitising Speech Recordings for Archival Purposes, page 8) would dictate that you find a cassette deck with XLR connectors as these are important for achieving a balanced signal. Noise reduction is also important, and if the original cassette was recorded with a noise reduction applied, then this should also be applied during digitisation. If the cassettes were recorded in the 1980s/1990s Dolby B (in particular) might have been applied. From experience within the British Stand-Up Comedy Archive, cassettes which were recorded professionally seem to have been recorded with a noise reduction applied (and sometimes this is even noted on the cassette which is really helpful!) but those more ‘home made’ recordings often don’t have any noise reduction; in these cases it is best to transfer without any noise reduction.
  • Audio capture card: We’re using a Roland UA-55 Quad-Capture audio capture card, again as this was quite an affordable option (c.£150). This is, in effect, an external sound card; the alternative would be to use an internal sound card with XLR connectors (which you’d have to install). We did actually purchase a good video capture card to use for both our audio and video digitisation work, but this had compatibility issues with our PC and so I sought an affordable capture card so we could start digitizing audio (we are using this video card in a mac tower for our VHS work though). An easy alternative (but which would not result in the best quality capture, especially if you are digitising for preservation) would be to use the PC’s existing internal sound card if you were digitising using stereo phono connectors (not recommened for preservation work).
  • Cables: two XLR connectors to connect the deck to the capture card; a usb cable connects the capture card to the PC (this would probably come with your audio capture card).
  • Software: we’re using Adobe Audition as it is part of the Adobe Creative Cloud package. As we are using some other Adobe CC programmes for image digitisation and embedding metadata (such as Bridge and Photoshop) this seemed the best option for us.  A free and good option is Audacity (http://audacityteam.org/). When capturing audio it is best practice to capture to at least 24 bit 48kHz (fine for spoken word, although for music it is recommended to captured 24 bit 96kHz). More information on this can be found on the International Association of Sound and Audiovisual Archives website and ‘guidelines for the production and preservation of digital audio objects
Cassette and MiniDisc Deck used for BSUCA digitisation / transfer

Cassette and MiniDisc Deck used for BSUCA digitisation / transfer

MiniDisc

MiniDisc capture has been a bit more of a compromise, in terms of our equipment:

  • MiniDisc Deck: We are using the Sony MiniDisc MD5-JE530 as this is a deck that was already available to us from within Campus Support here at the University of Kent (so free. We have also since been donated another MiniDisc deck by the School of Engineering and Digital Arts – thanks EDA!)
  • Audio capture card: Roland UA-55 Quad-Capture USB Audio/midi interface (price as above). The MD5-JE530 has an optical digital connection, whereas the UA-55 has a coaxial digital connection only. We didn’t want to purchase an additional audio capture card just for MiniDiscs so we purchased…
  • …the Pro-Signal PSG08095 Optical to Coaxial Adaptor (under £10) and a…
  • ….Digital Audio Coaxial Cable (1m) (about £2)
  • Software: Adobe Audition (as above). MiniDiscs used the ATRAC (Adaptive Transform Acoustic Coding) compression which sampled at 16 bit 44.1kHz and so when transferring MiniDiscs we capture at this rate (capturing at a higher bit rate and sampling frequency will only increase the file size but not the quality).

I aim to provide more updates soon, looking at how we are transferring digital files held on other physical media (such as audio CD and DVD), and in time we will also report on our VHS digitisation.


Reading list:

  • Jisc Digital Media, ‘Equipping an Audio Digitisation System’, http://www.jiscdigitalmedia.ac.uk/guide/equipping-an-audio-digitisation-system/show-hidden
  • Dietrich Schüller, Audio and video carriers: Recording principles, storage and handling, maintenance of equipment, format and equipment obsolescence, http://www.tape-online.net/docs/audio_and_video_carriers.pdf
  • Mike Casey and Bruce Gordon, Sound Directions: Best Practices for Audio Preservation, http://www.dlib.indiana.edu/projects/sounddirections/papersPresent/sd_bp_07.pdf
  • International Association of Sound and Audiovisual Archives, IASA-TC 03 The Safeguarding of the Audio Heritage: Ethics, Principles and Preservation Strategy, version 3 December 2005, http://www.iasa-web.org/sites/default/files/downloads/publications/TC03_English.pdf
  • Bartek Plichta and Mark Kornbluh, Digitizing Speech Recordings for Archival Purposes, http://www.historicalvoices.org/papers/audio_digitization.pdf


Adventures in audiovisual digitisation (part 1)

Part of the mission of the British Stand-Up Comedy Archive (BSUCA) Beacon project has been to establish standards, workflows, and policies with regards to digitisation and digital preservation, with the aim to inform the future collecting and preservation activities of the University’s Special Collections & Archives department.  Partly we wanted to see what digitisation work we could do in-house, if any, or if we would need to outsource the digitisation. Digitising audio-visual material is not easy, which is why few archives undertake AV digitisation in-house, or at all, and perhaps why there are few accessible resources for those trying to find out how to digitise in-house:

  1. There are problems of the degradation of various AV formats. This is one of the reasons why we need to digitise material on formats that are likely to degrade (otherwise we may lose the recording). This degradation can cause problems in your workflow; for example having the knowledge to spot mould, sticky shed, and then what to do about this, or how to splice a broken tape or reel (see point 3).
  2. There are also problems of technical obsolescence. This is another reasons for digitisation; the format may be stable (reel-to-reel tapes can be fairly stable) but the equipment to replay them (and therefore digitise them) are increasingly becoming obsolete; if we don’t digitise the material soon, whilst there is still affordable equipment, we may lose the opportunity for the material to be preserved and made accessible. For the formats within the BSUCA this is common when you consider the date of much of our material, which ranges from 1973 through to 2016. We currently have AV recordings on: audio cassette, reel-to-reel, MiniDisc, DAT, audio CD, VHS, Betacam, DVCam, DVCam mini, MiniDV, U-Matic, DVD, as well as digital originals (wav and mp3 files). Many of these formats were market-driven (MiniDisc for example) and were hailed as the next great format before being usurped by newer formats which were more affordable or more accessible. Another connected issue is that equipment may be available, but it is more likely than not to be second hand, and in need of servicing or maintenance: you do not want your equipment to compromise your digitisation work.
  3. Finally, a major issue when digitising AV for preservation and access is that of quality control. Much AV digitisation is carried out by trained audio engineers (who are able to spot and solve the issues identified in points 1 and 2).

It was an important part of this project to see whether we could digitise material in-house, with limited equipment and expertise. This is because we recognise that we are going to receive an increasing amount of audiovisual material within the BSUCA collections, due to the nature of the Archive, but also that we are likely to receive more AV material generally as part of Special Collections & Archives as we collect more material from the mid- and late- twentieth century. Outsourcing digitisation can be expensive; you obviously benefit hugely from the expertise of trained audiovisual engineers, but if AV material is a large part of your collections, outsourcing all of it is not feasible due to budgetary constraints.

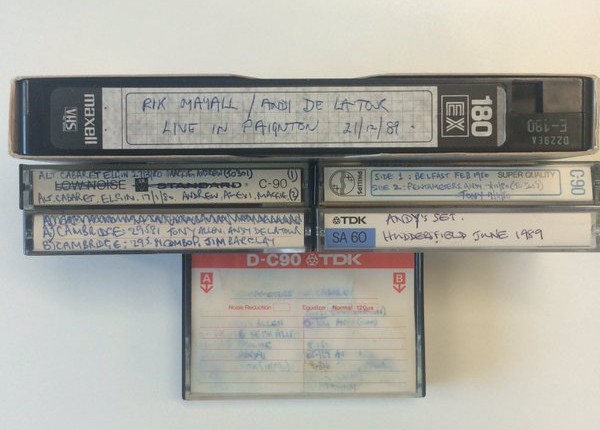
Audio from the Andy de la Tour Collection

Audio from the Andy de la Tour Collection

The situation we have found ourselves in with regards equipment and expertise has definitely been one of compromises. For example:

  • We have settled with purchasing second-hand equipment as that way it is possible to use semi-professional equipment; there are no newer models, within our budget, for semi-professional use, only those created for domestic purposes.
  • We have also borrowed (or been given) equipment from other departments around the University, no longer used by that department due to its obsolescence, but perfect for the requirements of our project.
  • And we have sometimes settled on outsourcing the digitisation (so far DAT and U-Matic).

When we started the BSUCA project in January last year (2015) I found it quite difficult to find easily accessible information about what hardware and software we’d need for digitising audio-visual material, where to find equipment for sale, as well as workflows for how to actually start digitising material. The resources from Jisc Digital Media on digitising audio and video were really helpful, as were the Guidelines for the preservation of sound recordings guide from the Endangered Archives Programme at the British Library. However, I found that the equipment recommended was no longer widely available, so I did a lot of extra research on particular models which would be affordable but also meet the standards we require. In case other archivists, curators, interested people, are thinking about digitising audio-visual material in house, I thought in my next post I’d list the equipment we have been using (starting with audio cassettes and MiniDiscs), and why (I’m not endorsing any particular models, other makes/models are available!) and later I’ll aim to share our workflows.

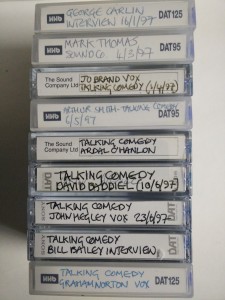
Interviews with comedians on DATs (Digital Audio Tapes) from the John Pidgeon Collection

Interviews with comedians on DATs (Digital Audio Tapes) from the John Pidgeon Collection

Some resources: